Recipe

Chocolate Covered Frozen Bananas

Via Kara Stout

Via Kara Stout

Ingredients 

  • 4 ripe (but not brown) Equal Exchange bananas, bottoms trimmed, but unpeeled
  • 6 ounces Equal Exchange Organic Dark Chocolate, broken up (choose your favorite bar)
  • 1/4 cup cream (or vegan option= 1 tablespoon coconut oil)
  • 1/2 cup chopped topping of your choice (nuts, candied ginger, crushed cookies, coconut, etc.)

Preparation

  1. Peel bananas. Pierce each banana lengthwise with a wooden skewer freeze for at least 15 minutes, or wrap tightly in plastic or foil and freeze for up to a week.
  2. Melt the chocolate in a double boiler (or self made double boiler), a small saucepan over very low heat, or the microwave. Whisk in the cream or coconut oil and transfer the chocolate mixture to a shallow bowl. If you're using nuts, put them on a plate next to the melted chocolate.
  3. Peel the plastic / foil off bananas, dip them first in the chocolate covering the banana completely, let the chocolate drip off and cool slightly then sprinkle with toppings. Wait a few minutes and then place bananas on a piece of parchment paper in the freezer. Repeat with all of the bananas. The chocolate will cool quickly, so if necessary, reheat chocolate.
  4. Freeze bananas for 30 minutes or until chocolate is hard. You can put them in a wax- paper-lined airtight container and freeze them for longer. 

Banana chocolate pieces modification: Peel bananas, cut into 1-2 inch chunks. Follow steps 2-4, but leave pieces on wax paper in freezer until chocolate is hard, then store in an airtight container.


Reprinted by Equal Exchange.

DIY Kombucha

DIY Kombucha

A popular item for Mariposa shoppers, Kombucha is a bubbly, refreshing brew that also serves as a source of healthy probiotics.

Making kombucha can also be a fun and satisfying DIY project. The only challenge can be finding a scoby, the Symbiotic Culture Of Bacteria and Yeasts that floats in your brew, infusing the liquid with good bacteria. To find a scoby, put the word out to your neighbors, friends, and fellow Co-op shoppers. Anyone who brews on a regular basis will have extras. Another strategy is to look at the bottles of plain, unflavored kombucha and select the one with the largest floating blob of scoby. Strain the drink, and use the contents of the strainer as your scoby culture. The starter tea, or already-brewed kombucha, is essential to acidify the brew enough to keep less desirable bacteria from flourishing, so don't skimp on this ingredient.

Ingredients

  • 14 cups purified water
  • 4-8 teabags (white, green or black, not caffeine-free herbal teas) or 4-8 teaspoons loose tea
  • 1 cup sugar
  • 2 1/2 cups starter tea (already-made kombucha; you can use bottled)
  • Scoby

Equipment

  • 1 gallon jar or crock, no metal
  • Thermometer
  • Strainer
  • Cloth to cover jar and rubber band or string to secure it
  • Bottles with good lids for finished kombucha

Preparation

  1. Start by sanitizing your jar, strainer, measuring cups and spoons and stirring spoon; either run them through the dishwasher or boil enough water to pour into the jar, drop the spoons and cups in, and then drain. Pour boiling water over the strainer. Let dry. Wash your hand thoroughly; don't use antibiotic soap.
  2. In a large pot, bring 2-3 cups of the purified water to a boil. Add the teabags or loose tea and steep for about 5-10 minutes, then remove the teabags, or strain into the clean one gallon jar. Stir the sugar into the hot tea until dissolved, then add the remaining water. Use your thermometer to check the temperature of the tea—you need it to drop to under 85⁰F. When the tea is cool, slip the scoby into the mixture. It should float, if it falls to the bottom and stays there it may be dead.
  3. Cover the jar with cloth and secure with the rubber band or string. Keep the jar in a warm spot; the kombucha will brew more quickly at 75- 80 degrees. If you live in a cooler climate, you may want to invest in a warming device, like a brew belt or a seed sprouting mat that doesn't get above 75 degrees. The kombucha takes 7-9 days in a warm room, but takes up to two weeks in a cool room.
  4. Check the kombucha daily. A layer of scoby should form on the surface, making a thin film at first, then growing thicker. Floating yeast colonies will form, and as your kombucha starts to bubble, they will rise and fall. After the first few days, put a straw down the side, to avoid disturbing the surface, and take a taste. At first it should taste like sweet tea, and gradually become less sweet and more fizzy, like plain bottled kombucha. It will smell like cider vinegar, but not taste that sour. If it starts to taste very sour, it is overdone, and some of the good bacteria are dying off.It is still useful as vinegar, so don't throw it away. When it is ready, remove the scoby and bottle the kombucha.
  5. If your scoby does not float, or a skin never forms on top of the brew, or any kind of visible mold occurs, discard and start over.
  6. Keep your scoby at room temperature in enough plain brewed kombucha to cover by an inch, or start a new batch immediately. They can keep, in a dark spot like a cupboard,for three months, as long as you keep replenishing the kombucha.
  7. For bubbly kombucha, bottle the tea with a strong lid and leave it out to carbonate itself by continuing to ferment overnight. Be very careful, since the bottles can explode. Some brewers recommend using plastic bottles for this process. When the plastic bottle becomes very firm when squeezedthe kombucha is done. Chill the tea to stop the action. Drink cold. The kombucha should keep for a month.
  8. To flavor your kombucha, pour flavored waters or juices into the bottles before adding the finished kombucha, or put slices of ginger root or zest right in the bottle.


Authored by Robin Asbell. Reprinted by permission from StrongerTogether.coop. Find articles about your food and where it comes from, recipes and a whole lot more at www.strongertogether.coop

Fair Trade Chocolate Chip Banana Pancakes

Banana Pancakes

Ingredients 

  • 1 ½ c. flour
  • 1 Tbsp. sugar
  • 2 tsp. baking powder
  • ½ tsp. cinnamon
  • 1 ¼ c. milk
  • ½ c. Equal Exchange bananas, mashed (check your local food co-op!)
  • 1 egg, lightly beaten
  • 1 tsp. vanilla
  • ½ c. Equal Exchange Chocolate Chips

Preparation 

  1. Combine flour, sugar, baking powder and cinnamon in a large bowl.
  2. Mix milk, banana, egg and vanilla until well combined. Stir into the bowl of dry ingredients.
  3. Fold in ¼ cup of the chocolate chips.
  4. Spray your griddle with cooking oil and place over medium heat.
  5. Pour batter onto the griddle into the pancake size you desire. Make a stack of small ones, or a few extra large pancakes!
  6. Cook for about 2 minute, or until the tops begin to bubble. Then, flip the pancake and cook for another minute or until golden.
  7. Work your way through the batter, reapplying cooking spray as needed.
  8. Top your pancakes with more chocolate chips and serve.


Reprinted from Equal Exchange

11 veggie noodles we’re drooling over

Get more veggies in your life! Veggie noodles are often gluten-free and low carb.  

Rainbow Pad Thai

Eat the rainbow.

Carrot pasta with a creamy zesty garlic sauce

Carrot noodles will make any dish instagram-able

EASY SESAME CUCUMBER NOODLES

A take on cucumber salad.

“RAMEN” BURGERS WITH PARSNIP NOODLE BUNS

Parsnips cannot be ignored when it comes to veggie noodles.

Feed Me Phoebe

Feed Me Phoebe

ZUCCHINI NOODLES WITH CREAMY AVOCADO PESTO

Blend avocado for a creamy texture and healthy fats.

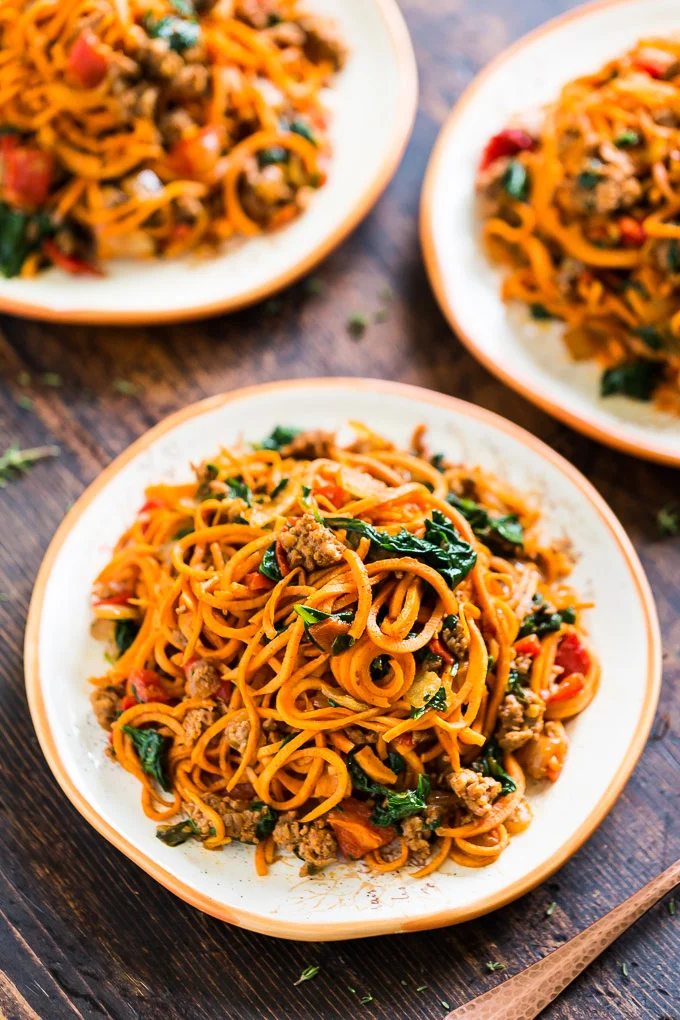
Coconut Curry With Sweet Potato Noodles

Sweet potatoes boost flavor and add extra vitamins.

FRENCH ONION ZOODLE BAKE

Bake noodles and cover with cheese for a winter time treat. 

Climbing Grier Mountain

Climbing Grier Mountain

Sweet Potato Noodles with Chorizo, Roasted Red Pepper, and Spinach

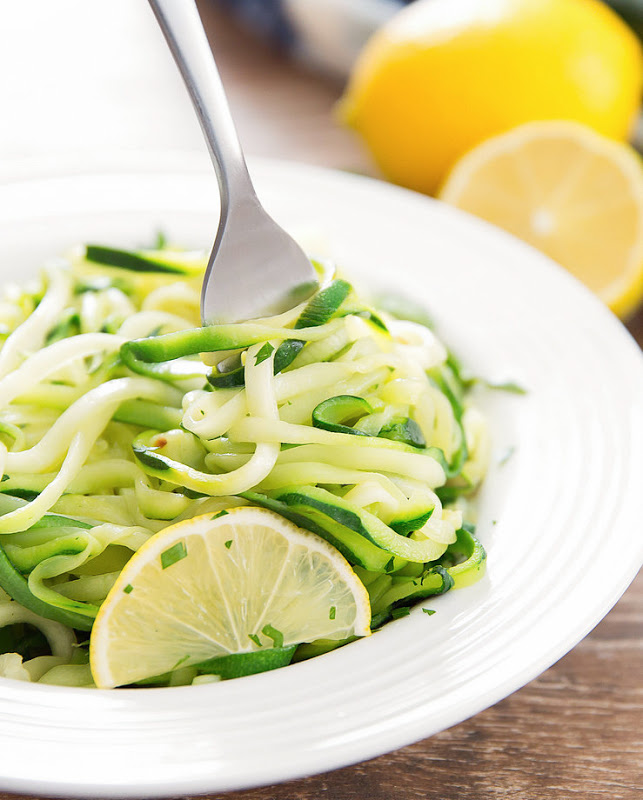
LEMON GARLIC ZUCCHINI NOODLES

A dish that can be ready to eat in 20 minutes. 

GARLICKY BUTTERNUT SQUASH NOODLES WITH SPINACH AND RICOTTA

Running to the Kitchen

Running to the Kitchen

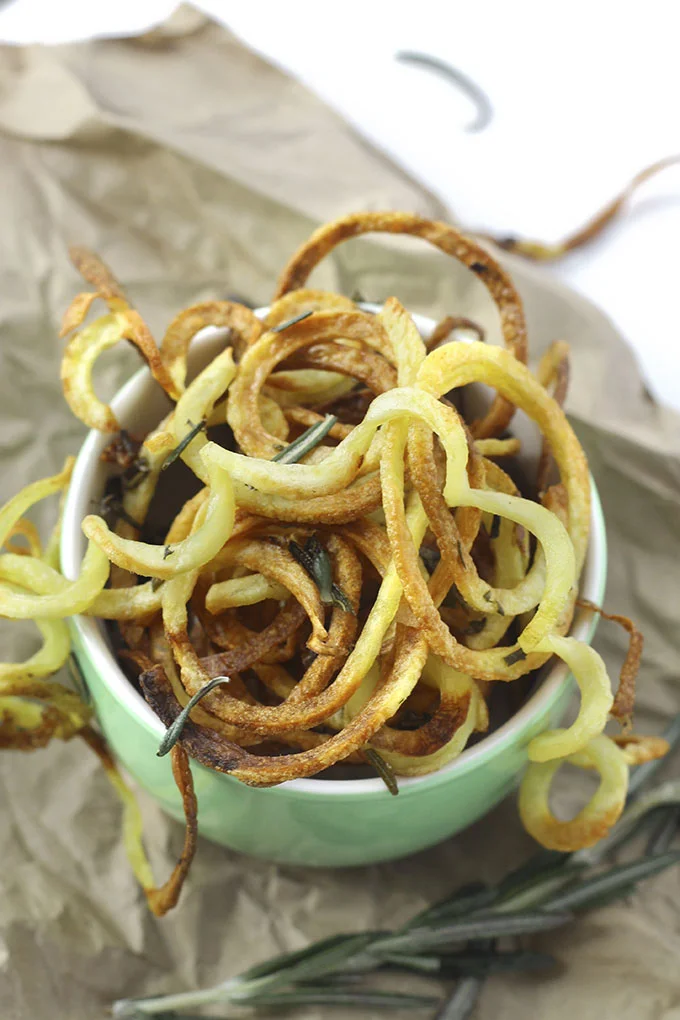
CRISPY BAKED CURLY FRIES

Classic.

Avocado Brownies

Brownies are a perfect place to slip in some creamy avocado. In place of some of the butter, avocado adds creaminess with more nutrients and fewer calories. You will never know there's a healthy fruit in there, thanks to the cocoa and vanilla. 

Ingredients

  • 3/4 cup unbleached flour
  • 1/2 cup cocoa
  • 1/2 teaspoon salt
  • 1/4 teaspoon baking soda
  • 3/4 cup mashed avocado (1 large or 2 small)
  • 1/2 cup white sugar
  • 1/2 cup brown sugar
  • 2 large eggs
  • 1/2 cup canola oil or 1 stick melted butter
  • 1 teaspoon vanilla

Preparation

  1. Preheat the oven to 350°F. Lightly oil an 8-inch square baking pan.
  2. In a large bowl, mix the flour, cocoa, salt and baking soda, crushing any lumps of cocoa with the back of your spoon.
  3. In a food processor, puree the avocado until completely smooth. Add the white and brown sugars and process, then add the eggs, oil or butter and vanilla and process until smooth. Scrape the avocado mixture into the flour mixture and stir to combine. Spread the batter in the prepared pan.
  4. Bake for 20-25 minutes, until the top looks dry and a toothpick inserted in the middle of the pan comes out with big wet crumbs attached-not dry. Don't overbake, if you like a gooey brownie, take it out while a little gooey in the middle and chill to make it easier to cut.
  5. Cut into 16 squares and serve.

Serving Suggestions

Serve these tasty brownies plain or dusted with powdered sugar. For a super-chocolate treat, drizzle with melted chocolate.


Authored by Robin Asbell. Reprinted by permission from StrongerTogether.coop. Find articles about your food and where it comes from, recipes and a whole lot more at www.strongertogether.coop

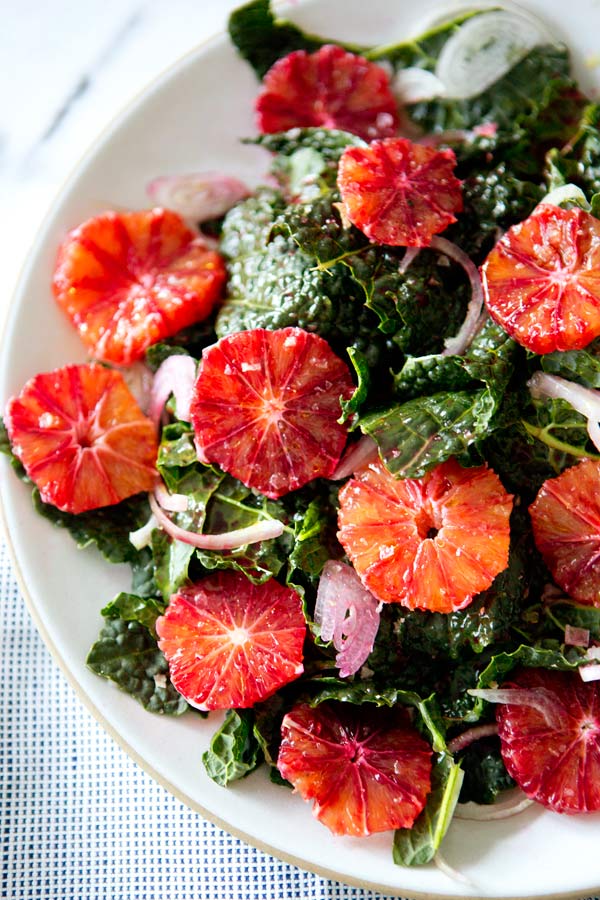
Kale & Blood Orange Salad

Via A House in the Hills

Via A House in the Hills

Ingredients

  • 4 medium blood oranges
  • Juice of 1 large lemon
  • 3/4 teaspoon salt
  • 1/2 teaspoon freshly ground black pepper
  • 1 clove garlic, smashed
  • 1/4 cup olive oil
  • 1 bunch kale, washed, stems removed
  • 1/2 cup slivered red onions
  • 8 ounces feta cheese, crumbled or cubed

Preparation

  1. For the dressing, zest and juice one of the blood oranges into a small bowl or jar. Taste the juice. If it is very tart, add a tablespoon of lemon juice; if it is very sweet, use two tablespoons blood orange juice and 2 tablespoons of lemon juice. Add salt, pepper, garlic and olive oil and whisk well or shake to combine. Set aside.
  2. Roll the kale leaves up, cut crosswise into thin ribbons and place into a serving bowl. Pour the dressing over the kale and use your hands to toss, then massage for a minute or two to tenderize the leaves.
  3. Peel and segment the remaining blood oranges, either with your fingers or with a knife, cutting between the membranes to make neat sections. Cut each segment into 2 or 3 pieces and add to the bowl with the kale. Add the red onions and feta, toss to mix and serve. 

Serving Suggestion

This salad is a great make-ahead, since, unlike many tossed salads, it keeps for up to 3 days in the refrigerator. Serve with roasted meats, or top with leftover cooked sliced chicken for a hearty lunch salad. Substitute navel oranges for the blood oranges if you prefer; just be sure to use 2 tablespoons of lemon juice with the sweeter navel orange juice in the dressing.


Reprinted by permission from StrongerTogether.coop. Find articles about your food and where it comes from, recipes and a whole lot more at www.strongertogether.coop

Spicy Sweet Potato Wedges with Jalapeño Sour Cream

Photo Credit: Cooking Light

Photo Credit: Cooking Light

These tasty wedges pair perfectly with roast turkey sandwiches, breakfast hash, or a big bowl of chili.

Ingredients

  • 2 pounds sweet potatoes, washed and cut lengthwise into large wedges
  • 2 tablespoons vegetable oil
  • 2 cloves garlic, minced
  • 1 teaspoon chili powder
  • 1 teaspoon paprika
  • 1/2 teaspoon cumin powder
  • 1/2 teaspoon dried thyme
  • 1/2 teaspoon onion powder
  • 1/2 teaspoon chili flakes
  • 1/4 teaspoon salt
  • 1/4 teaspoon black pepper
  • Pinch of cayenne pepper

Jalapeño Sour Cream

  • 1/2 cup light sour cream
  • 1 jalapeño pepper, seeded and minced
  • 2 tablespoons fresh lime juice
  • Pinch of salt

Preparation

  1. Preheat the oven to 400° F.
  2. In a large bowl, mix together the oil and spices. Add the sweet potato wedges and toss until well coated. Spread the seasoned wedges out on a large sheet pan. Place in oven and bake for 20 minutes, stir or flip the wedges, and bake an additional 20 minutes until browned and tender.
  3. While potatoes are roasting, mix together the sour cream, jalapeño pepper, lime and salt in a small bowl. Refrigerate until ready to serve.
  4. Remove the wedges from the oven and let them rest for 5 minutes before serving with the jalapeño sour cream.


Reprinted by permission from StrongerTogether.coop. Find articles about your food and where it comes from, recipes and a whole lot more at www.strongertogether.coop

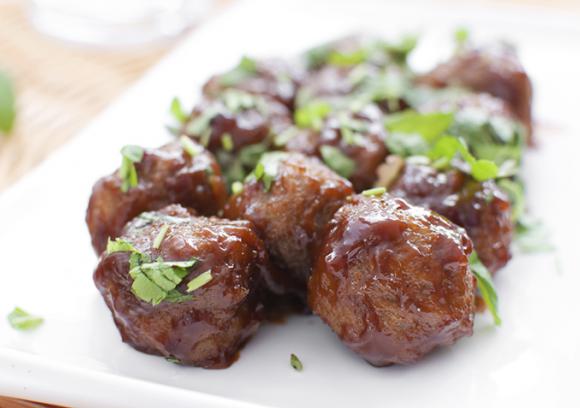
Sweet & Sour Vegetarian Meatballs

These tasty vegetarian meatballs make a delicious appetizer or accompaniment to fettuccine Alfredo or mushroom risotto.

Ingredients

  • 2 large eggs
  • Oil to grease pan
  • 1/2 cup shredded Colby cheese
  • 2 tablespoons minced yellow onion
  • 1/2 teaspoon dried basil
  • 1/4 teaspoon dried sage
  • 1/4 teaspoon salt
  • 1 cup crushed herbed stuffing mix
  • 1/4 cup cottage cheese
  • 6 tablespoons pecan meal (grind about 1/2 cup pecan halves)

Sauce

  • 2 tablespoons canola or vegetable oil
  • 3 tablespoons apple cider vinegar
  • 10 tablespoons apricot jam
  • 6 tablespoons ketchup
  • 1 tablespoons minced yellow onion
  • 1/4 teaspoon dried sage
  • 1/4 teaspoon dried oregano
  • 1/4 teaspoon hot sauce

Preparation

  1. Preheat oven to 350°F.
  2. Oil a sheet pan with sides or an oven-safe casserole dish.
  3. In a large mixing bowl, mix together all vegetarian meatball ingredients. Once thoroughly combined, roll into 1- to 2-inch balls. The mixture should yield approximately 16-18 vegetarian meatballs. Place them in the oiled pan and bake for 15 minutes. Turn them and bake another 15 minutes.
  4. While the vegetarian meatballs are baking, mix together all sauce ingredients in a separate bowl.
  5. After the vegetarian meatballs have baked for 30 minutes, coat them with the sauce and bake another 10-15 minutes. Serve warm.

Serving Suggestion

Goes great with fettuccine Alfredo or mushroom risotto.


Authored by Open Harvest Co-op Grocery. Reprinted by permission from StrongerTogether.coop. Find articles about your food and where it comes from, recipes and a whole lot more at www.strongertogether.coop

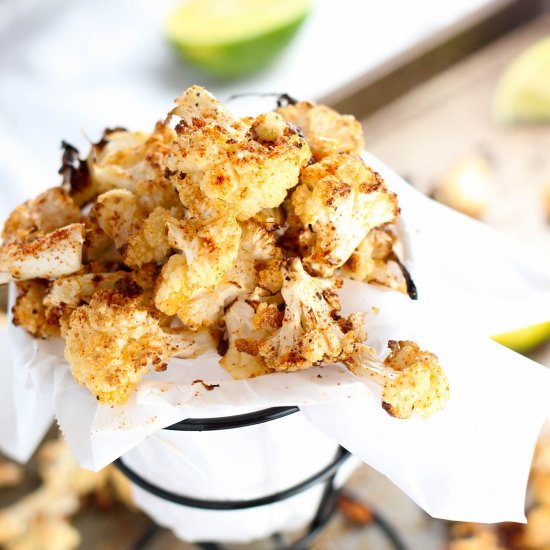
Smokey Roasted Cauliflower

Photo Credit: Recipe Hub

Photo Credit: Recipe Hub

Roasted cauliflower takes on the rich smoky flavor of chipotles in adobo in this quick and simple recipe.

Ingredients

  • 1 head cauliflower, stems removed, cut into florets
  • 3 tablespoons olive oil
  • 3 cloves garlic, peeled and roughly chopped
  • 1 teaspoon minced chipotle peppers in adobo sauce
  • Salt and black pepper to taste

Preparation

  1. Preheat oven to 375ºF.
  2. In a large mixing bowl, toss the cauliflower florets with the olive oil, garlic, chipotle peppers and a pinch each of salt and pepper. Spread the cauliflower out onto a baking sheet and place in the oven. Bake for 20 to 25 minutes, stirring halfway through, until cauliflower begins to brown and is tender.

Serving Suggestion

A great side for roasted or grilled beef, pork or chicken, this savory cauliflower is also a tasty snack, warm or chilled, served with lime-spiked yogurt dipping sauce. Substitute smoked paprika for the chipotle peppers to reduce the spice level.


Reprinted by permission from StrongerTogether.coop. Find articles about your food and where it comes from, recipes and a whole lot more at www.strongertogether.coop

Five Spice Wings

Five Spice Chicken Wings

Spiced and seasoned with Korean chili paste and Chinese 5 spice powder, you'll love these baked chicken wings.

Ingredients

  • 3/4 cup tamari
  • 1/4 cup seasoned rice wine vinegar
  • 2 tablespoons sesame oil
  • 2 tablespoons gochujang (Korean chili paste)
  • 2 teaspoons minced garlic
  • 1 tablespoon minced ginger
  • 1 scallion, minced
  • 2 teaspoons Chinese 5 Spice powder
  • 2 pounds chicken wings, tips removed

Preparation

  1. Combine tamari, vinegar, oil, gochujang, garlic, ginger, scallion and spice powder in a blender and puree. Reserve 1/4 cup of the marinade and refrigerate for later use. Place the wings in a large bowl or plastic ziplock bag and cover with remaining marinade. Marinate the wings in the refrigerator for at least 2 hours (or up to 24).
  2. Preheat oven to 450°F.
  3. Remove wings from the marinade, lay them on an oiled sheet pan, drizzle lightly with leftover marinade from the bag or bowl and roast for about 12 to 15 minutes. When finished, toss the still-warm wings with the additional reserved marinade.

Serving Suggestion

These wings are best served either hot or at room temperature, garnished with finely-sliced scallion and sesame seeds. Offer extra sauce or Sriracha glaze on the side.


Reprinted by permission from StrongerTogether.coop. Find articles about your food and where it comes from, recipes and a whole lot more at www.strongertogether.coop