Holiday

12 Days of Gifting

Tis the season for gifting. Check out our top 12 gifts for everyone on your list. 

1. Mariposa enamel pins & patches

Mariposa Food Co-op Enamel Pins

We are so excited (maybe too excited) to introduce enamel pins and patches to our merchandise department! Branded iron-on embroidered patches and enamel pins look great on jackets and backpacks. 

2. Philly Co-op Coffee

Philly Co-op Coffee

New Philly Co-op Coffee is roasted by local roaster, Philly Fair Trade Roasters. $1 from each pound purchased will be donated to the Philadelphia Area Cooperative Alliance.  

3. DIY essential oil blends

Lavender Essential Oil.jpg
 

Grab a few tincture bottles and create your own blend of essential oils to gift. 

4. Essential oil diffusers

Sparoom scentifier

Essential oil diffusers are a safer alternative to candles and have added aromatherapy benefits to aid sleep, pain, repel insects, improve cognitive function and more. Find essential oil diffusers on Owner Deals this month, too! 

5. DIY charcuterie & cheese plate

DIY Charcuterie Plate

Perfect for your foodie friends, choose from a variety of local cheeses and cured meats. Our favorites include new Primo Naturale Spanish and Italian meats and cooperatively-produced Cabot cheese. Go all out and add local breads, jams, and fruits.

6. Locally made Christina Maser candles

Christina Maser Candles

Christina Maser candles are natural in color and scent. The soy candles burn for over +75 hours! Pair candles with new room sprays as an added treat. 

7. DIY trail mix

DIY Bulk Trail Mix

Stroll down the bulk aisle and create a unique trail mix blend. Our bulk aisle is stocked with a variety of nuts, dried fruits, and candies. Note, please keep product in separate containers until you complete your purchase at the register. 

8. Mariposa gift card

Mariposa Gift Card

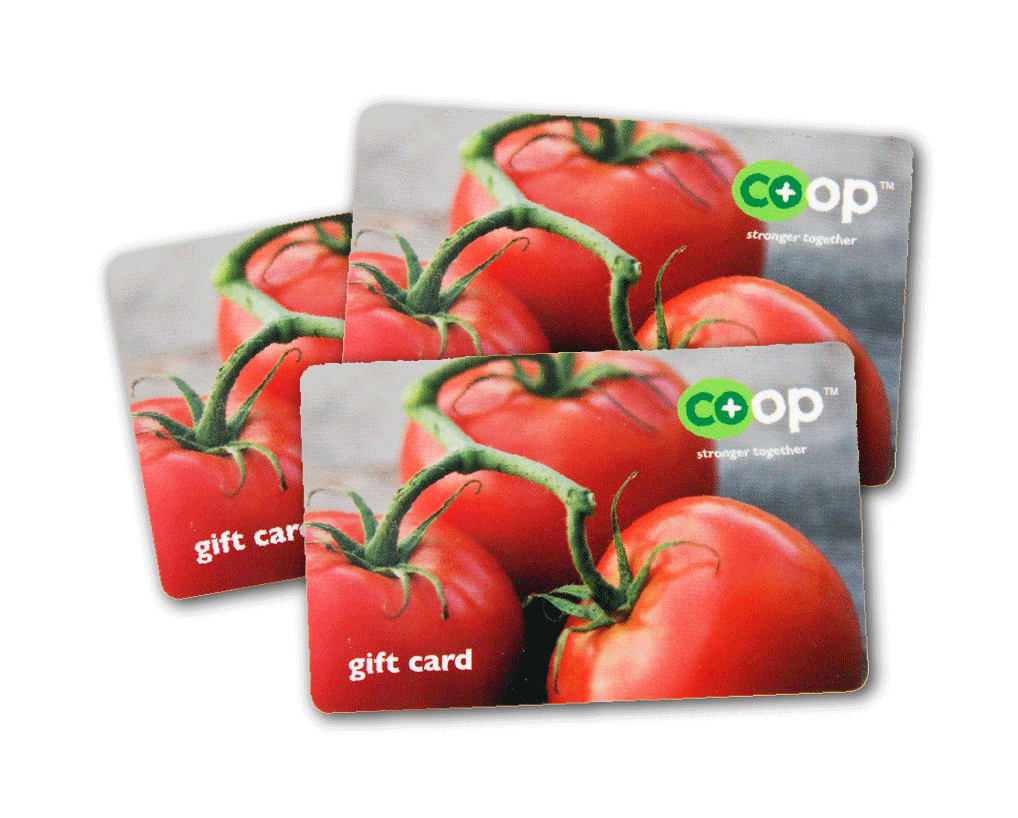
Got a cooperator on your list? Give the gift of a Mariposa gift card! Gift cards can be used toward equity payments or to purchase any product on our shelves. 

9. Fair Trade chocolates

Fair Trade chocolates make great stocking stuffers. Choose from a variety of chocolates like Endangered Species, Equal Exchange, Tony's Chocoloney and more.   

10. Health & Beauty Gift Sets

Dr. Bronner's Gift Set
Veriditas Gift Set

Need something quickly? Veriditas, Dr. Bronner's, and Zum Bar gift sets are ready to gift.

11. Queen Alaffia clutch

Queen Alaffia Clutch

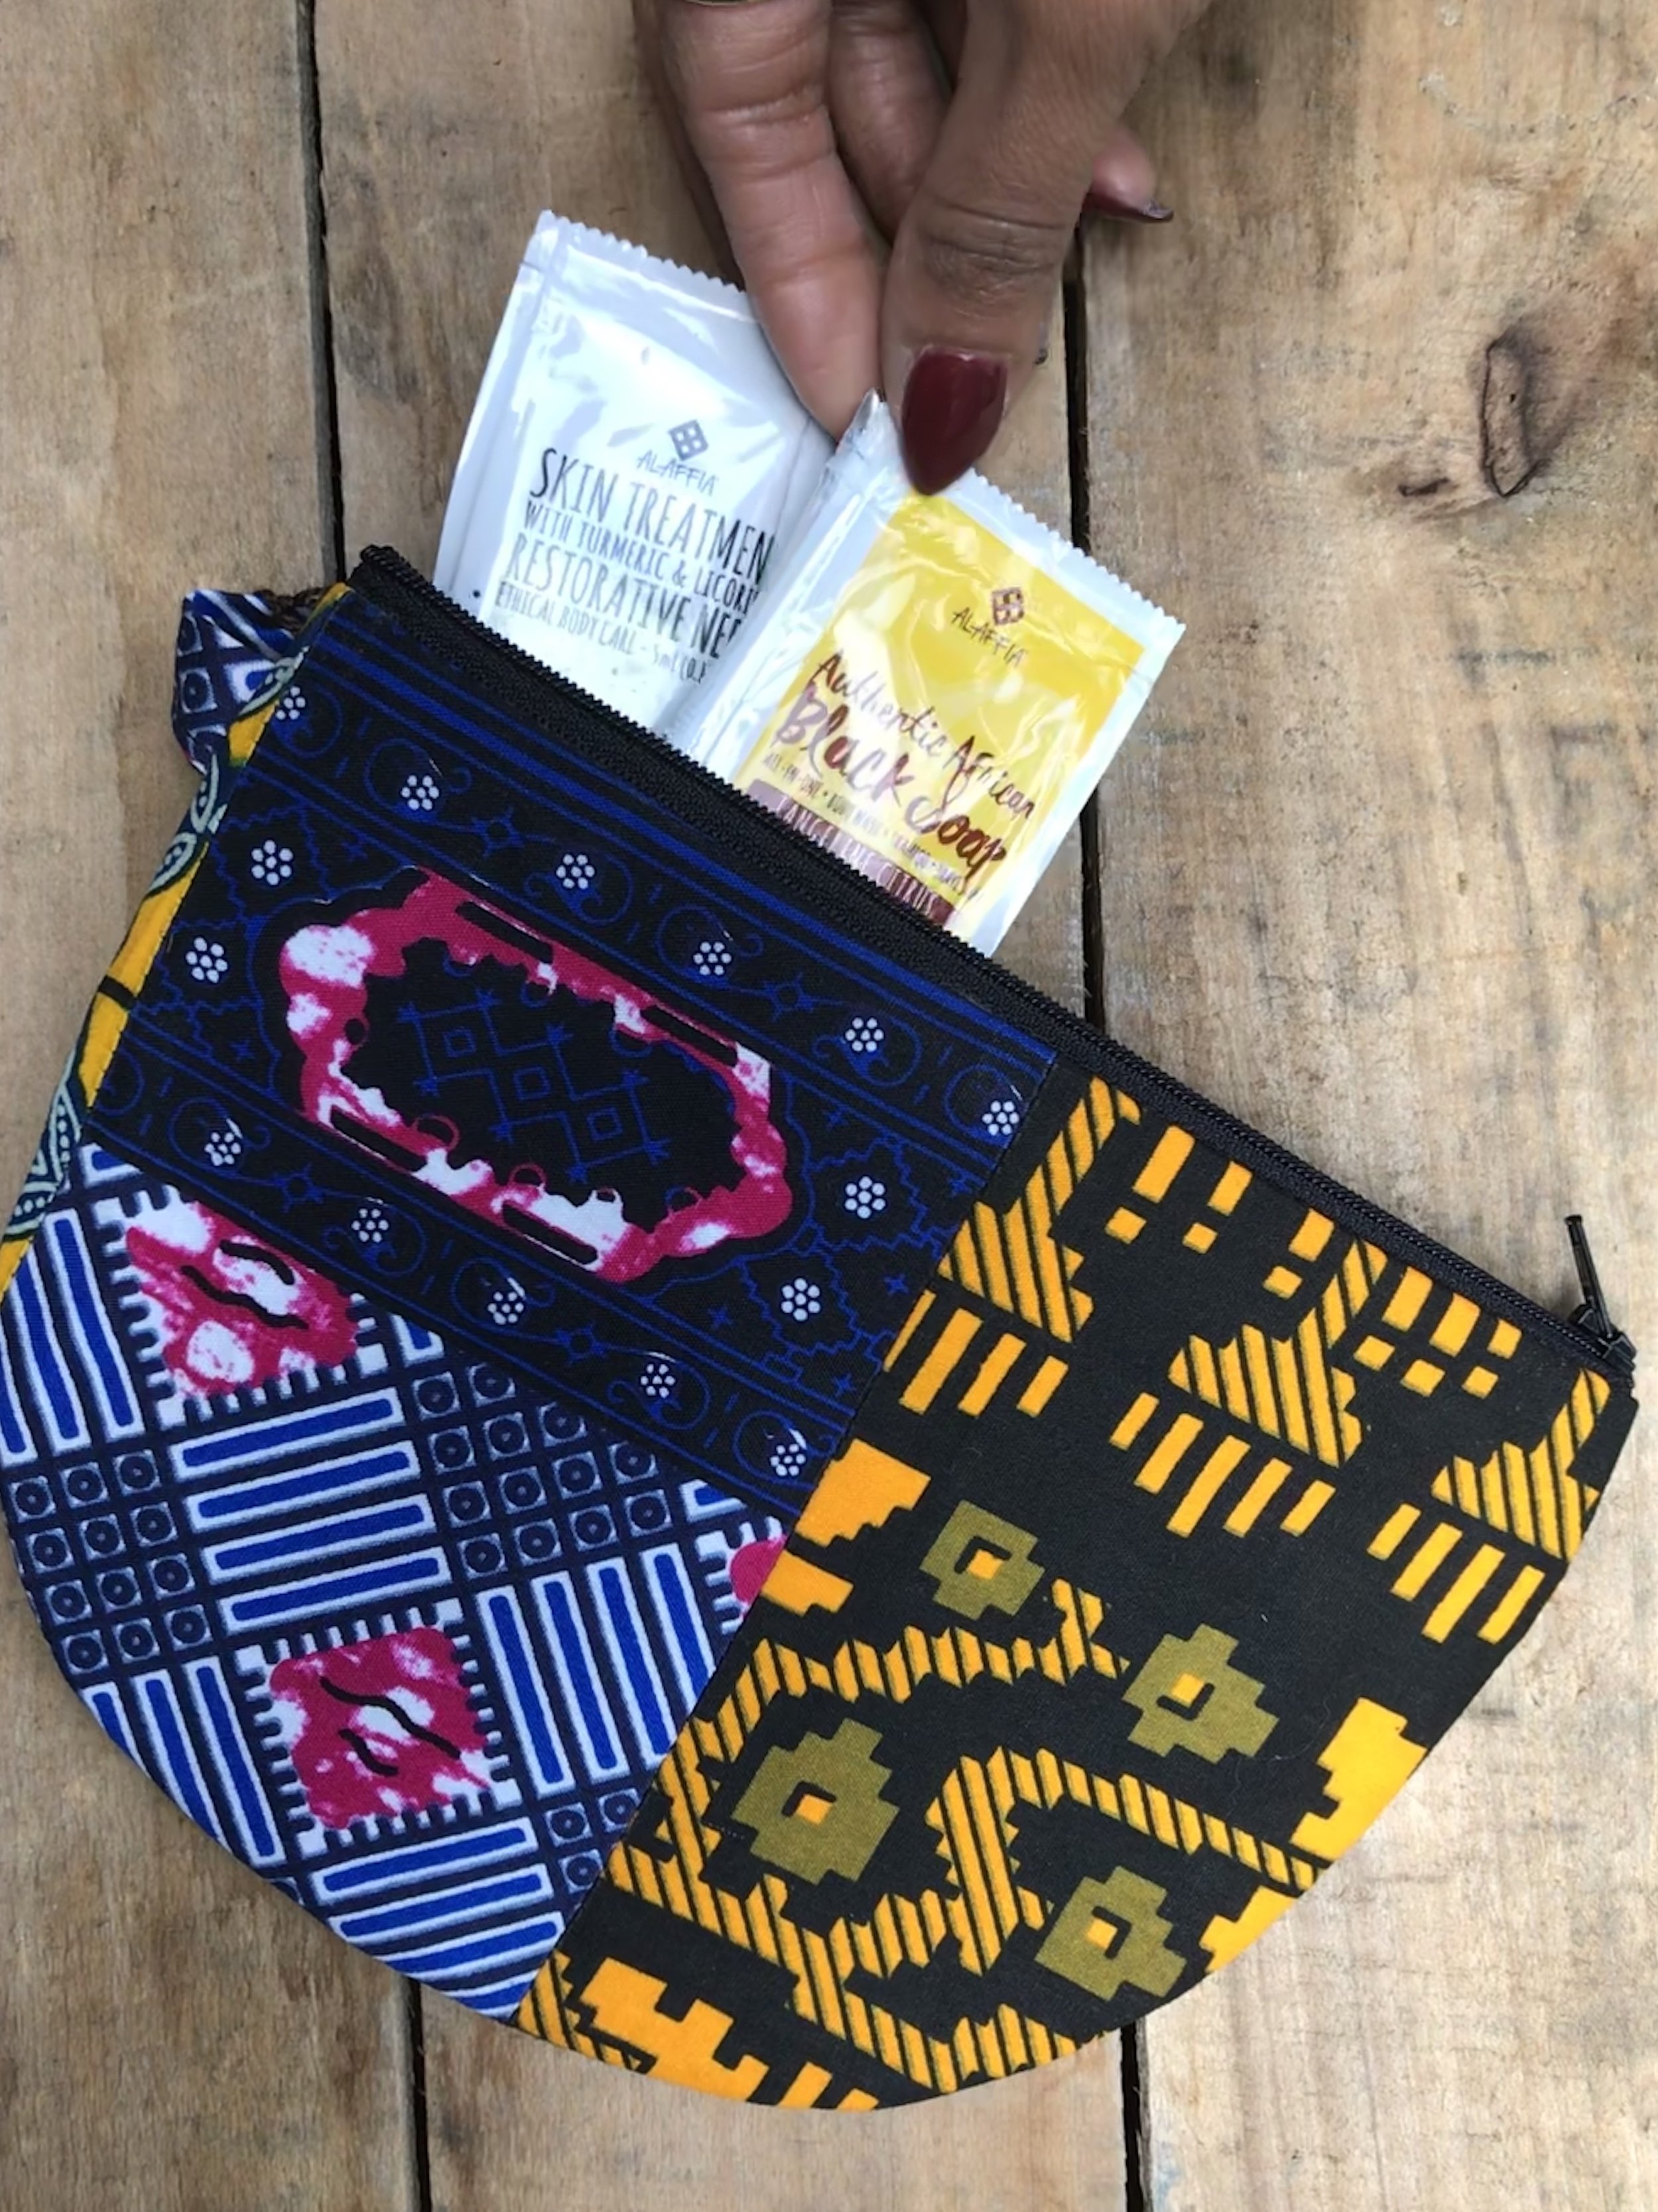
Gift with a purpose. Queen Alaffia clutches are handmade by women that fell prey to the sex trade in Togo, West Africa. Your purchase empowers their lives by providing ethical employment and fair wages. Plus, every clutch includes four Alaffia samples.

12. 2018 planners & calendars

2018 Calendars Planners

Planners and calendars are THE gift for your organized family member, friend, or colleague. 

Watermelon-Strawberry Lime Cooler

Cool off with a great pink smoothie combo. Watermelon and frozen strawberries make a wonderful slushy drink. A touch of lime and a sprig of mint give it a refreshing twist.

Watermelon Lime Cooler

Ingredients

  • 1 cup frozen strawberries
  • 4 cups cubed watermelon, seeds removed
  • 2 tablespoons fresh lime juice
  • Mint sprigs

Preparation

In a blender, combine the watermelon and strawberries. Add the lime juice and puree. Serve immediately with mint sprigs for garnish.


Authored by Robin Asbell. Reprinted by permission from StrongerTogether.coop. Find articles about your food and where it comes from, recipes and a whole lot more at www.strongertogether.coop

Shop at Mariposa to support workers’ rights

In honor of May Day and workers’ rights, Mariposa will be donating 5% of our sales on Monday, May 1 to the Popular Alliance for Undocumented Workers' Rights (PAUWR).

Who is PAUWR?

May Day National Strike

The Popular Alliance for Undocumented Workers' Rights advocates for justice, equality, and dignity for undocumented restaurant workers by raising public awareness and educating workers to achieve fair immigration laws and policies.

Co-owners of South Philly Barbacoa, Cristina Martinez and Ben Miller, are leading the charge to change the law to allow undocumented immigrants an easier path to getting immigration status. Miller said that undocumented workers often can’t speak up about working conditions for fear of being fired or deported.

Learn more about PAUWR and the May 1 General Strike.

Why are we donating?

May Day International Workers Day

May Day, or International Workers’ Day, celebrates workers’ rights and commemorates the Haymarket affair of 1886. What started as a peaceful protest demanding 8 hour workdays and safe working conditions in Chicago, the strike turned deadly when seven officers and four activists were killed due to rising tensions between police and protesters. Eight activists were eventually sentenced to death, though little evidence was provided of their conviction.

As a cooperatively-owned grocery store, Mariposa recognizes the importance and necessity of fighting for workers’ rights. To participate in the national strike, Mariposa has opted to stay open to serve our community while donating 5% of our sales to PAUWR.

DIY: Natural Egg Dye

Easter Eggs

Egg dyeing is a fun way to celebrate this time of year—and it's a tradition that goes way back—as much as 5,000 years when Persians celebrated springtime with eggs colored with plant-based dyes. Plant dyes can be just as useful today and they're plentiful; in fact you very well might have dye-worthy ingredients in your kitchen already.

Here are some great plant-based dyes—fruits, vegetables, spices and flowers.

Items Needed

  • White eggs (or try brown, keeping in mind color results will vary)
  • Egg carton
  • Stock pan(s)
  • Water
  • White vinegar
  • Slotted spoon
  • Natural materials for dyeing (see table).
Natural Egg Dye

Optional: Tape, string, rubber bands, cheese cloth squares, natural beeswax crayons to create designs on eggs, and vegetable oil for an extra sheen. 

Directions

Beet dye including pulp (top), onion skin dye with celery, bay and ivy leaves wrapped in cheese cloth (middle two), turmeric dye with rice wrapped in cheese cloth (bottom).

Hot Bath Method

  1. Place uncooked eggs in a stainless steel stock pan. Add water 2-3 inches above eggs. (When using bottled juice, fill 2-3 inches above eggs. Do not add water.) Add natural dye ingredients and 1-2 tablespoons vinegar per quart of water.

  2. Cover and bring to boil, reduce heat and simmer for 15-20 minutes.
  3. Carefully remove eggs with a slotted spoon and air dry.

Cold Bath Method

The process for cold dyeing is much the same as the hot method except the eggs and dyes are cooked separately.

  1. Simmer the dye ingredients (water, vinegar and dye matter) for 20-30 minutes or longer, until the dye reaches your desired shade.
  2. Allow the liquid to cool and submerge hard-boiled eggs in the dye for at least 30 minutes.
  3. Carefully remove eggs with a slotted spoon and air dry.  

Notes, Tips & Techniques

Color variation

Colors may vary depending on steeping time and foods used to dye eggs.

Deeper colors

The longer the eggs stay in the dye, the deeper the color will be; leaving the eggs in the dye for several hours or overnight (in the refrigerator) is recommended for achieving deep colors. Allow the liquid and eggs to cool before refrigerating and ensure that the eggs are completely submerged in the dye. Eggs will be speckled if the dye matter remains in the liquid. For more uniform colors, remove the dye matter from the liquid, by straining the liquid through a coffee filter, before refrigerating.

Egg flavor

The flavor of the egg may change based on the dye, so if you plan to eat your dyed eggs, a shorter dye bath and fresh ingredients may be preferable.

Drying

Make a drying rack by cutting the bottom off an egg carton and turning it upside down.

Decorating

  • Wrap onion skins around eggs, then wrap the entire egg with a cheese cloth square and secure it with string before placing the eggs in the dye.
  • Wrap string or rubber bands around eggs before dyeing to create stripes (use rubber bands for cold dyeing only).
  • Draw designs on hot, warm or cold hard-boiled eggs with crayons. When using hot or warm eggs, the crayon may melt slightly on contact with the egg (if eggs are hot, hold eggs with a potholder or rag to prevent finger burns). Crayon covered eggs should only be dyed in cold dyes as the crayon wax will melt in hot liquids.
  • Gently wipe dry dyed eggs with vegetable oil to give eggs an added sheen.


Reprinted by permission from StrongerTogether.coop. Find articles about your food and where it comes from, recipes and a whole lot more at www.strongertogether.coop

All about the dough

Berry Pie

Pie is one of those treats that is incredibly versatile. The size, shape and design can be tailored to the baker’s liking and fillings can be easily changed to reflect the season.

But, the best part of the pie? The crust.

Follow our basic guide to create the best homemade crust this holiday season.

The 3:2:1 pie dough ratio

The most flaky, tender crust comes down to a simple 3:2:1 ratio of ingredients—flour, fat, water— no actual recipe needed. This is the basics foundation for not only pies, but also tarts, galettes, pot pies, hand pies and more.

The “3” in this ratio is flour. Pastry flour contains less gluten than all-purpose flour and therefore creates a more tender crust, but all-purpose flour will work just fine if that’s what you have on hand.

The “2” is fat. Butter is the most common type of fat used, but other solid fats will work as well. Lard produces a flaky crust; coconut oil can be used to create a vegan crust. Substitute chicken or bacon fat for a portion of the fat in savory applications. Whatever fat you choose, it must be cold and solid - no liquid oils as they don't create the necessary air pockets for a light, flaky crust.

The “1” is ice cold water. Dissolve about 1/4 teaspoon of salt per batch to make the water extra cold.

The amounts in the 3:2:1 ratio refer to the weight (e.g. 3 oz. flour, 2 oz. fat, 1 oz. water). With those exact measurements you could make a pie crust, but it would be quite small. To know exactly how much dough you need you must first know how big your pie pan is. A basic rule of thumb: one inch of pan equals one ounce of dough. Using the standard nine inch pie pan, follow this recipe:

4.5 ounces flour + 3 ounces fat + 1.5 ounces water + 1/4 teaspoon salt = 9 ounces

Don't have a kitchen scale? Never fear. One cup of flour weighs roughly 4.5 ounces. How convenient! And 1 ounce equals 2 tablespoons. With this in mind, here’s the same recipe as above for a single batch:

1 cup flour + 6 tablespoons fat + 3 tablespoons water + 1/4 teaspoon salt = 9 ounces

Making a pie that requires a top crust? Just double the recipe.

How to mix pie dough

Pecan Pie

The most important step is cutting the cold fat into the flour. If you don’t do this, you’ll lose the flakiness. The easiest way to do this is with a food processor. Add your flour and then your cold fat (cut up into smaller tablespoon-size chunks). Now pulse the machine until the mixture creates pea-size pieces of fat evenly distributed throughout the flour.

With the machine running, stream in your water until the mixture forms a dough. You may need to add slightly more water if your mixture is too crumbly, but don’t add too much more or your crust will turn out tough. A little crumble is what you’re looking for.

If you don’t have a food processor, you can cut your butter using a pastry blender: two butter knives. Put your flour in a bowl, add your cold butter or other fat and start cutting away until you get those pea-size pieces. Make a well in the middle of your mixture, add your water and combine by hand until a dough forms.

Chill pie dough before using

Chilling the dough prior to baking is key. If you’re making a single batch, form the dough into a disk, wrap it up and place it in the fridge to chill for at least an hour. If you’re making a double batch, divide the dough in two and do the same thing.


Authored by Megan Dom. Reprinted by permission from StrongerTogether.coop. Find articles about your food and where it comes from, recipes and a whole lot more at www.strongertogether.coop.

Planning for Thanksgiving

Holiday gatherings don’t need to be elaborate or stressful. Whether you’re entertaining a couple or a crowd, Mariposa is here to help. Here are a few ideas to get you started:

How much food will you need?

These general guidelines will help you plan the correct amount of food to make or purchase.

Great beginnings

Set out a tray or two of snacks before the main meal; it’s a great way to welcome guests.

  • Fresh dates served with a spiced, roasted nut mix
  • Artisanal cheese tray of local cheeses, with fine flatbread crackers and crostini
  • Crispy raw vegetables and a selection of dips, like soft chevre blended with herbs, hummus with a swirl of fresh or prepared pesto, or garlicky aioli
  • Meat or veggie paté, sausage bites, cooked shrimp and smoked fish with spicy mustard sauce and baguette slices

Delicious desserts

An alternative (or addition) to the traditional pie makes for a memorable ending.

  • Homemade brownies topped with mint or vanilla ice cream and chocolate sauce
  • A selection of chocolate truffles served with freshly-baked cookies
  • Warm brie glazed with apricot preserves and sprinkled with toasted pecans or walnuts

Kid Friendly Veggie Skeleton

Ingredients

  • 1 jicama, peeled
  • 1 head of cauliflower florets
  • 1 red pepper, sliced
  • 1 orange pepper, sliced
  • 1 yellow pepper, sliced
  • 24 green beans
  • 2 cherry tomatoes, halved
  • 1 zucchini, sliced
  • 1 carrot, sliced
  • 5 broccoli florets
  • 1 mushroom, sliced
  • 2 black olives, 1 sliced, 1 diced
  • 1/4 cup arugula
  • 1 cup hummus (for dipping)
  • 1 medium pumpkin (optional)

Preparation

Skull

Pick a platter for the background. Cut peeled jicama in half. Using the peeler, peel the sides of the jicama until it is pear shaped. The wider end will be the top of the skull. It should be full and rounded. Start narrowing the sides about half way down and round off the bottom. This will be the jaw. The narrow end is the jaw of the skull. Carve a flat spot near the bottom for the mouth. Carve two flat spots near the top for eyes. Place the skull at the top of the platter.

Spine

For the spine, arrange cauliflower florets in a row under the skull. Pile red, orange, and yellow pepper slices on either side of the cauliflower for ribs.

Arms and hands

Stack 3 beans on each side for upper arms. Stack 3 more on each side for lower arms. Put a cherry tomato half on each side between the upper and lower stacks for elbows. Add zucchini slices for palms. Make fingers out of carrot slices.

The rest of the body

Arrange 5 broccoli florets at the bottom of the spine for hips. Make upper legs by stacking 3 green beans on each side of the broccoli. Make lower legs by stacking 3 green beans on each side below the upper legs. For knees place half a cherry tomato between the stacks on each side. For feet cut a mushroom slice in half.

Face and hair

Put round slices of olive on jicama for eyes. Add diced olive for the nose and teeth. Arrange arugula under the jicama for spooky hair.

Serving Suggestions

Hollow out a pumpkin and put a bowl full of hummus inside as a tasty dip. Arrange leftover veggies in a dish on the side.

Reprinted by permission from StrongerTogether.coop. Find articles about your food and where it comes from, recipes and a whole lot more at www.strongertogether.coop.

Savory Stuffed Pumpkin

Savory Stuffed Pumpkin

Celebrate fall with a savory mix of sautéed apples, garlic and sausage stuffed in pie pumpkin.

Total Time: 45 minutes; 25 minutes active Servings: 4-6

Ingredients

  • 2 small pie pumpkins
  • Pinch each of salt and black pepper
  • 1 tablespoon unsalted butter
  • 1/2 cup chopped onion
  • 8 ounces vegetarian or regular sausage, crumbled
  • 1 clove garlic, minced
  • 1/2 cup chopped Granny Smith apples
  • 1 6-ounce package stuffing mix
  • 1/2 cup shredded Swiss cheese (optional)
  • 1 cup vegetable broth

Preparation

  1. Preheat oven to 350ºF.

  2. Use a sharp knife to remove the tops from each pumpkin (like a jacko’-lantern). Scrape out the seeds and filaments and discard. Season the inside of the pumpkins with salt and pepper.

  3. Melt butter in a large skillet over medium heat. Add the onion and sauté for 5 minutes or until limp. Add sausage and cook until lightly browned, then add the garlic and apples and cook 2 minutes more. Remove from heat.

  4. In a medium bowl, combine the onion and sausage mixture with the stuffing mix, cheese and broth and mix together until combined and slightly moistened. Divide and lightly pack the stuffing into the pumpkins until completely full. Replace the tops on the pumpkins, place them on a lined or lightly-oiled baking sheet or dish and into the oven. Depending on the size of the pumpkin and amount of flesh, the pumpkins should take about an hour to bake. Check after 30 minutes and, when nearly cooked, remove the tops and bake until the filling is browned. The pumpkins are done when easily pierced with a knife. Use two metal spatulas to move them from the baking dish onto the serving platter, to help keep the pumpkins intact. To serve, slice pumpkins into wedges or halves.

Serving Suggestion

Slice the pumpkins into wedges or halves to serve and enjoy a scoop of pumpkin with each bite of stuffing. This dish makes an impressive vegetarian entrée or a hearty side dish when served in smaller portions. Change the stuffing to suit your tastes; try adding kale, spinach or sautéed mushrooms, or use shallots instead of onion, or cream instead of broth.

Reprinted by permission from StrongerTogether.coop. Find articles about your food and where it comes from, recipes and a whole lot more at www.strongertogether.coop.

DIY Body Scrub with Essential Oils

Your skin is your body's first line of defense against a host of tough customers - sun exposure, pollution, hot days and freezing cold temps. It's important to take good care of your skin with organic tools - such as body scrubs and essential oils - so it can take good care of you.  

Basic formula and function

Start with the basic formula: something scrubby + skin care oil. For scrubby ingredients, use food-grade, biodegradable ingredients like sugar, salt or coffee grounds (before or after brewing). These will exfoliate the skin, removing dry, dead and dull-looking skin cells and helping to prevent clogged pores. Incredibly, your skin will respond by generating new, fresh skin cells more quickly.

Next, choose plant-based oils that nourish the skin and provide lubrication for the scrubby ingredients. Sweet almond oil is a great choice, with its rich texture and skin-hydrating properties.

Add your favorite essential oils to the mix and take the benefits of your scrub to a whole new level of luxury and efficacy. 

Not sure where to start? Find some inspiration below. 

Clarifying Energizing Body Scrub

  • 4 tablespoons granulated sugar
  • 1/2 tablespoon coarsely ground coffee
  • 3 1/2 tablespoons sweet almond oil
  • 30 drops sweet Orange essential oil
  • 9 drops peppermint essential oil
  • 9 drops spearmint essential oil
  • 4-ounce amber glass wide-mouth jar

Clean & Fresh Body Scrub

  • 18 drops fresh ginger essential oil
  • 16 drops grapefruit essential oil
  • 14 drops coriander seed essential oil
  • 4 1/2 tablespoons granulated sugar
  • 2 1/2 tablespoons coconut oil
  • 1 teaspoon fresh grated ginger (optional)

Peppermint Citrus Scrub

  • 1 cup granulated sugar 
  • ¼-1/3 cup oil: coconut oil, olive oil, sweet almond oil, apricot oil, avocado oil, or a combination
  • Optional: 2-4 tablespoons orange or grapefruit zest (for extra exfoliation)
  • 10 drops peppermint essential oil
  • 10-15 drops wild orange essential oil (lemon or grapefruit will also work- or any combination of these)

Preparation

  1. In a mixing bowl, combine all ingredients and stir until well blended. Transfer to wide-mouth jar.
  2. To use, scoop scrub out of jar with fingertips and apply to skin using gentle circular motions.
  3. Rinse with warm water and pat dry.


Authored by Aura Cacia. Reprinted by permission from StrongerTogether.coop. Find articles about your food and where it comes from, recipes and a whole lot more at www.strongertogether.coop.