Entertaining

Poached Pears

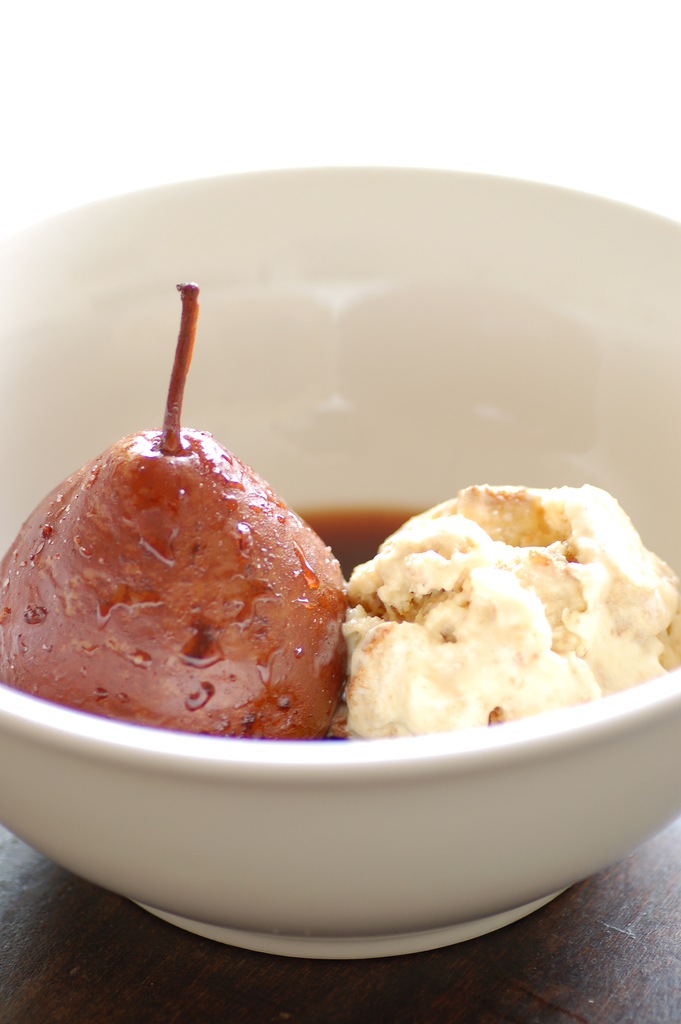
For such a delicious and elegant dessert, poached pears are amazingly simple to prepare.

Via Creative Commons

Via Creative Commons

Ingredients

  • 6 firm pears (not quite ripe),
  • peeled with stems on
  • 3 cups red wine
  • 1 cup water
  • 1 cup sugar
  • 1/2 vanilla bean, split in half lengthwise
  • 1 star anise
  • 2 tablespoons honey
  • 1 tablespoon lemon juice

Preparation

  1. Choose a cooking pot that will hold the pears snugly. Place red wine, water, and sugar in the pot. Cut the vanilla bean in half lengthwise and scrape the seeds into the pot; add the pods along with star anise, honey, and lemon juice.

  2. Bring the liquid to a simmer and cook for about 5 minutes, stirring to make sure the sugar is dissolved.

  3. Add the peeled pears, cover, and simmer for about 20 minutes until pears are tender.

  4. Remove the pears and continue simmering the liquid until it becomes thick and syrupy. Use this syrup to glaze the pears before serving.

Serving Suggestion

Serve pears warm or cold, with a dollop of whipped cream or crème fraiche, if desired.


Reprinted by permission from StrongerTogether.coop. Find articles about your food and where it comes from, recipes and a whole lot more at www.strongertogether.coop

Beet Pesto Crostini

Total Time: 35 minutes; 20 minutes active

Servings: 4

Earthy, vibrant beets combine with garlic and crunchy sunflower seeds in this unusual (and vegan) pesto appetizer. Unlike herb pestos, this keeps refrigerated for a few days, tightly covered.

Ingredients

  • 3 2-inch beets, about 6 ounces
  • 1 clove garlic, peeled
  • 5 tablespoons sunflower seeds, raw
  • 1 tablespoon extra virgin olive oil
  • 1/2 teaspoon salt
  • 8 slices baguette, toasted

Preparation

  1. Wash the beets, but don't peel them. Place them in a small pot and add water to cover by an inch. Put on high heat and bring to a boil, then reduce to a vigorous simmer. Cook for about 10 minutes, until a paring knife inserted in a beet slips in easily.
  2. Drain the beets and rinse with cold water, then trim the tops and slip the skins off under the cold water. Let cool.
  3. In a food processor, mince the garlic. Add 1/4 cup of the sunflower seeds and pulse to chop finely. Add the beets and process until finely chopped. Add the olive oil and salt and pulse just to mix, don't puree.
  4. To serve, spread about 1 1/2 tablespoons of the beet mixture on each baguette slice.


Reprinted by permission from StrongerTogether.coop. Find articles about your food and where it comes from, recipes and a whole lot more at www.strongertogether.coop

Holiday Cheddar Cheese Ball

Holiday Cheese Ball

Total Time: 15 minutes

Servings: 2 large balls (20 servings)

This festive holiday cheese spread is quick and simple to make and great for entertaining.

Ingredients

  • 1 pound cream cheese, softened
  • 1 cup cheddar cheese, grated
  • 1/4 cup Asiago cheese, grated
  • 2 tablespoons red bell pepper, diced
  • 2 tablespoons fresh chives, chopped
  • 2 tablespoons fresh parsley, chopped
  • 2 teaspoons garlic, minced
  • Salt and freshly ground black pepper

Preparation

  1. In a food processor, blend cream cheese until slightly fluffy. Add cheddar, Asiago, and garlic, and pulse until lightly blended.
  2. Scoop cheese mixture into a small bowl and add the bell pepper, chives, parsley, and salt and pepper. Mix well.
  3. Refrigerate mixture until cold, then form into balls.
  4. Roll in extra chives, parsley, or diced bell pepper and allow to come to room temperature before serving.

Reprinted by permission from StrongerTogether.coop. Find articles about your food and where it comes from, recipes and a whole lot more at www.strongertogether.coop

Creating the Perfect Cheese Plate

How to make the perfect cheese plate

Putting together a spectacular cheese platter is easier than you might think. Here are a few tips:

The cheese platter

  • Serve cheese at room temperature. The cold from the refrigerator inhibits its flavor, so take your cheese out half an hour before guests arrive to allow it to “bloom.”
  • Provide a serving utensil for each variety of cheese on your tray.
  • Serve a selection of three to five contrasting cheeses. Think different tastes, colors, and textures, like mild with robust (like Brie with blue cheese), fresh with aged (like Boursin with aged Gruyere), or soft with hard cheeses (like chevre with Parmesan).
  • Create a themed tray by offering cheeses from one region or source, or showcase an array of cheeses made from different milks (cow, goat, sheep).

Accompaniments

Whether you serve them individually or on the same platter, some foods are perfect complements to cheese. These include:

  • Fresh and dried fruits
  • Crostini, flatbread, and other crackers
  • Hearty and crusty breads
  • Olives
  • Nuts
  • Honey

To create an antipasto platter, include a mix of marinated vegetables and cured meats.

Wine and beer cheese pairings

In general, a wine that comes from the same geographic area as the cheese will be a good match. Here are some other pairings:

  • Goat cheeses and dry red wines
  • Cheddars with sweet wines and pale and brown ales
  • Fresh, medium, and hard cheeses with crisp, fruity red or white wine
  • Cheeses with bloomy rinds (like Brie) and fruity red wines or light, dry champagnes
  • Swiss cheeses with dark lagers, bocks, and Oktoberfest beers
  • Feta and wheat beers
  • Sweet cheeses with fruity beers


Reprinted by permission from StrongerTogether.coop. Find articles about your food and where it comes from, recipes and a whole lot more at www.strongertogether.coop

How to use Halloumi

If you haven't yet tried this unusual cheese, you're in for a treat—and a fun, delicious new addition to your grilling repertoire. Halloumi has been made in Cyprus, Greece for centuries. Traditionally made from unpasteurized sheep and goat's milk, Halloumi was often wrapped with mint leaves, which was used as a preservative, and, even now the cheese is often sold with mint as a garnish. The Halloumi from Cyprus has a Protected Designation of Origin (PDO), but "Halloumi-style" cheese is now made throughout the world.

Halloumi2_0.jpg

While you can eat Halloumi raw, it's usually enjoyed cooked—not just because you can, but also because cooking improves the taste and texture. Some of the saltiness (from brining) fades as it cooks. If you find Halloumi a bit too salty for your taste, simply simmer it in water for five minutes. Then refrigerate until firm again before cooking. The texture, which starts out a bit like mozzarella, becomes a bit creamier with cooking.

Halloumi will keep in the refrigerator unopened for as long as a year. Once opened, store it in the refrigerator in salt water in an airtight container for up to two weeks, or wrap it tightly in waxed paper, parchment paper or cheese wrap. Rewrap in fresh paper whenever you unwrap it. The cheese can also be frozen for a few months. Thaw it in the refrigerator a day before you want to use it.

Find some of our favorite Halloumi serving styles below.

Grilled Halloumi

To make grilled Halloumi, simply slide the cheese onto wooden skewers that have been soaked in water first. Drizzle the cheese with olive oil and sprinkle with spices, if you like. Cook the skewered cheese just two to three minutes on each side, until it's warmed through. Large pieces of Halloumi can simply be placed directly on the grill, or you can also fry Halloumi in a skillet.

Marinated Halloumi

Marinate the cheese before cooking—in olive oil, lemon juice, garlic, red pepper, oregano or combinations of other spices, such as cumin, chili powder, ground ginger or fresh herbs like thyme, mint, basil or rosemary for extra flavor.

Cypriot-style

Cypriot-style pairs Halloumi with watermelon, or with smoked pork or lamb sausage. Use it on sandwiches (it's delicious in pita with cucumbers and tomatoes), to stuff ravioli, and over pasta, potatoes, or salads (toss the grilled cheese with any greens, and try it in place of mozzarella in a Caprese salad). Place Halloumi on kebabs with veggies. Serve it with eggs for breakfast, and on grilled burgers (meat or veggie) and eggplant. Here's a tasty recipe for Grilled Eggplant Napoleon.

Honey & Halloumi

Try drizzling the cheese with honey—which plays off the saltiness—and serving on a cheese tray. A lager makes a perfect accompaniment.

Planning a Summer Picnic

There’s no better way to celebrate the beginning of summer than by planning a leisurely outdoor picnic. Here’s how to keep your picnic out of bug-bite and spoiled-food territory to enjoy warm breezes, delicious food and fun.  

Prep everything ahead of time

This may seem like a no-brainer, but putting in the time to chop your veggies, assemble your kebabs, or slice your baguette before leaving the house will keep the fuss—and mess—to a minimum once you get outside.

Planning_a_Summer_Picnic_0.jpg

Stay bug-free

Bring small citronella candles to place along your picnic table. If you’re picnicking on a blanket (where fire isn’t the friendliest option), pack a bottle of chemical-free mosquito repellent from the body care section of your co-op.

Avoid foods that spoil easily

That means mayo, cream-based dips, and fresh cheeses are best left at home—unless you’re planning to transport them a short distance on ice and eat them immediately. Any leftovers should be thrown away (so plan your portions carefully!).

Practice food safety

Take care to make sure all raw meats are wrapped separately, and transport them on ice. Use separate cutting boards and utensils for handling raw meat (bring an extra plastic bag to keep them in), and wash your hands as often as possible. Hand sanitizer is a must.

Cook meat with care

photo-1455734729978-db1ae4f687fc.jpg

If you’re grilling outdoors, keep raw meats below cooked meats on the grill at all times, and make sure they’re cooked thoroughly before eating (a meat thermometer can confirm doneness). Hamburgers should be cooked to 160 degrees, poultry to 170 degrees, and beef, veal, and lamb cuts to 145 degrees.

Keep it earth-friendly

Bring reusable napkins (you’ll not only avoid fly-away paper napkins, but cloth napkins can also be used to wrap food and bottles for transport). If you are using disposable products, look for recycled and biodegradable options at the co-op. And make sure your picnic spot’s as pretty as a picture for its next al fresco diners!