Black Bean Chili

Recipe Information

Total Time: 

1 hour, 20 minutes; 15 minutes active

Servings: 

4-6

This easy, meatless classic has a little extra texture thanks to quinoa, which simmers in the black bean broth and gives it body.

Ingredients

The High Five

  • 1 cup dry black beans

  • 2 large carrots

  • 1 medium green pepper, chopped

  • 1 15-ounce can diced tomatoes

  • 1/4 cup quinoa, rinsed

Pantry and Kitchen Items

  • 4 cups water

  • 1 1/2 tablespoons chili powder

  • 1 teaspoon salt

Preparation

  1. Sort and rinse the black beans. Place in a large pot with the water and bring to a boil, then cover and cook on medium-low for 45 minutes.

  2. Add the carrots, green pepper, canned tomatoes and juices, quinoa, chili powder and salt. Return to a boil, then reduce to medium-low and cover the pot. Cook for 20 minutes, until the beans and vegetables are tender. Uncover and simmer for five minutes to thicken slightly. Serve hot.

Serving Suggestion

Cornbread flecked with diced jalapeno peppers makes a tasty accompaniment to this hearty chili.

Nutritional Information

210 calories, 1.5 g. fat, 0 mg. cholesterol, 670 mg. sodium, 40 g. carbohydrate, 10 g. fiber, 12 g. protein

Reprinted with permission from grocery.coop

Huevos Tortillas

Ditch the toast for breakfast one in a while, and bake these light and crispy corn tortilla bases for your meal. A lively chop of veggies gives the whole affair a great flavor and burst of color, and the egg makes its own sauce, if you leave the yolks a little runny.

Ingredients

  • 4 6-inch corn tortillas

  • cooking spray

  • 2 cups chopped fresh tomato

  • 1/2 medium red bell pepper, chopped

  • 2 large scallions, chopped

  • 1/4 cup fresh cilantro leaves, chopped

  • 1/2 tablespoon cumin

  • 1 clove garlic, crushed

  • Louisiana style hot sauce

  • 4 large eggs

  • Salt and pepper

Preparation

  1. Preheat the oven to 400 F. Spray a sheet pan with oil, then place the tortillas on the oil, and spritz the tortillas. Bake the tortillas for 4 minutes, then flip them and bake for 3-4 minutes more. When the tortillas are toasted and crisp. Transfer the tortillas to the paper towel lined plate and sprinkle with salt.

  2. While the tortillas bake, chop the tomatoes, bell pepper, scallions and cilantro and mix in a bowl. Add the cumin, garlic, and hot sauce to taste.

  3. Place a large cast iron or non-stick skillet over medium heat. Let the pan get hot for a minute, then spray or oil it well. Crack each egg and slip into the hot pan, leaving plenty of room so that they don't run together. Sprinkle with salt and pepper, and cook until the whites are firm and the yolks are of desired doneness, 3-6 minutes.

  4. To serve, top each tortilla with tomato mixture, then a fried egg. Serve immediately.

Nutritional Information

191 Calories, 8 g. fat, 211 mg. cholesterol, 224 mg. sodium, 20 g. carbohydrate, 2 g. fiber, 10 g. protein

Reprinted with permission from grocery.coop

Spicy Corned Beef Hash with Chorizo

A delicious and hearty breakfast or brunch!

Total Time: 

30 minutes

Servings: 

4

Ingredients

  • 3 tablespoons unsalted butter

  • 1 cup onion, finely chopped

  • 2 cups cooked corned beef (1/2 pound), chopped

  • 3 cups cooked potatoes, cubed (Shortcut: use frozen potatoes)

  • 1/2 cup cooked chorizo, casings removed, chopped

  • 4 eggs (optional)

  • Salt and pepper

Preparation

  1. Heat butter in a large (14-inch) cast iron or non-stick skillet over medium heat. Add the onion and cook a few minutes, until translucent.

  2. Mix in the chopped corned beef, chorizo and potatoes. Stir and spread evenly over the pan. Turn heat to medium low and press down on the hash mixture with a spatula.

  3. Shake, but don’t stir, the hash mixture. Let it brown like a giant potato pancake, being careful not to burn the butter.

  4. Once browned, use the spatula to flip over sections in the pan so they can brown on the other side, pressing down with the spatula as needed. (Add more butter to the pan if the hash is sticking.)

  5. Continue to cook in this manner until the hash is nicely browned and looks lightly crisped.

  6. Remove from heat, stir in some freshly chopped parsley. Add plenty of freshly ground black pepper, and salt to taste.

Nutritional Information

Per Serving: 247 calories, 19g fat, 70mg cholesterol, 3g carbohydrates, 2g dietary fiber, 16g protein, 169mg sodium

Reprinted with permission from grocery.coop

PRODUCT RECALL: ALEXIA FOODS ORGANIC YUKON HASH BROWNS

Alexia Foods

Organic

Yukon Hash Browns 16oz

UPC 8-34183-00303-5

Affected dates/Sell By Dates: SEP 4 2022 – DEC 15 2023

Lamb Weston (Alexia Foods) is implementing a voluntary recall of the Alexia Foods – Organic Yukon Hash Browns (16oz), due to the possible contamination of Listeria Monocytogenes. Listeria Monocytogenes is an organism which can cause serious and sometimes fatal infections in young children, frail or elderly people, and others with weakened immune systems. Although healthy individuals may suffer only short-term symptoms such as high fever, severe headache, stiffness, nausea, abdominal pain and diarrhea, listeria infection can cause miscarriages and stillbirths among pregnant women. Although no illnesses have been identified in connection with the products, consumers should not eat any of the recalled items, as they could be contaminated with Listeria Monocytogenes. While these products are not ready-to-eat items and have cooking instructions which, if followed, will reduce consumer risk, there remains some risk that the mishandling of this product prior to or without adequate cooking may cause illness. This recall is being made with the knowledge of the U.S. Food and Drug Administration. No other Alexia products are affected by this voluntary recall. If you have purchased this product, immediately dispose of it or return it to Mariposa Food Co-op for a full refund.

Grilled Salmon with Blueberry Salsa

Break the mold with this fruity salsa atop chipotle pepper-spiced salmon.

Total Time: 

30 minutes

Servings: 

4

Ingredients

  • 4 4-ounce salmon fillets

  • 1/2 teaspoon chipotle pepper powder

  • 1 tablespoon olive oil

  • Pinch of salt

  • 1 cup fresh blueberries

  • 1 large jalapeño pepper, finely chopped

  • 2 tablespoons finely chopped red onion

  • 1/4 cup chopped cilantro

  • 1 tablespoon lime juice

  • 1/4 teaspoon salt

Preparation

  1. Heat the grill. Place the salmon skin-side down on a plate and rub with olive oil, sprinkle with chipotle pepper and salt; let stand.

  2. In a medium bowl, combine the blueberries, jalapeño, red onion, cilantro, lime juice and salt. Stir vigorously, coarsely mashing some of the blueberries to release the juice.

  3. When the grill is hot, use tongs to swab the grate with a paper towel dipped in vegetable oil. Place the salmon on the hot grill, skin-side up. Let the salmon cook until it has grill marks and the edges look browned, about 3 minutes. Carefully lift each fillet and turn over. Close the lid of the grill and cook about 4 minutes more for thin, wild-caught fillets, longer for farm-raised salmon. When the fish is just cooked through, transfer to a clean platter. Top each fillet with about a quarter cup of salsa, and serve hot.

Serving Suggestion

Cook foil-wrapped baked potatoes and sweet corn on the grill to make this a summer celebration. A patio and a bottle of Chardonnay complete the scene.

Nutritional Information

260 calories, 12 g. fat, 65 mg. cholesterol, 390 mg. sodium, 7 g. carbohydrate, 1 g. fiber, 31 g. protein

Reprinted with permission from grocery.coop

Peppery Honey-glazed Chicken

Recipe Information

Total Time: 

3 hours; 45 minutes active

Servings: 

4-6

Give the barbecue sauce a break and try this peppery-sweet glaze instead. Black pepper and jalapeño add just enough heat to make it interesting, and the honey creates a sweet, sticky glaze on the chicken. The addition of vinegar balances it all for a tongue-tingling delight.


Ingredients

  • 6 chicken thighs, skin on

  • 2 tablespoons mixed peppercorns

  • 1 tablespoon coarse salt

  • 1 tablespoon extra virgin olive oil

  • 2 medium jalapeños, thinly sliced

  • 1/2 cup honey

  • 2 tablespoons white wine vinegar

  • 1 pinch salt

Preparation

  1. Place the chicken thighs on a double layer of paper towels and pat dry. In a spice grinder, coarsely grind the peppercorns and transfer to a small bowl. Add the salt and mix. Drizzle the oil over the chicken and rub to coat, then sprinkle the peppercorn mixture over the chicken and rub to coat. Refrigerate, uncovered, for at least two hours. You want the skin to be as dry as possible.

  2. In a small pot, combine the sliced peppers, honey, vinegar and salt and bring to a boil. Boil for three minutes, reducing the heat as needed so it won’t boil over. Keep warm.

  3. Preheat the grill to medium heat. Oil the grate and place the chicken on it. Turn every five minutes, until almost cooked. It should take about 20 minutes (an instant-read thermometer inserted in one thigh should read 120-130 F before you start basting).

  4. Brush the honey sauce on the chicken and turn every two minutes until a thermometer reads 165 F. Transfer the chicken to a platter and let stand for five minutes before serving.

Serving Suggestion

Serve with rice and vegetables or a cabbage slaw and sweet corn on the cob.

Nutritional Information

400 calories, 23 g. fat, 115 mg. cholesterol, 810 mg. sodium, 25 g. carbohydrate, 1 g. fiber, 24 g. protein

Reprinted with permission from grocery.coop
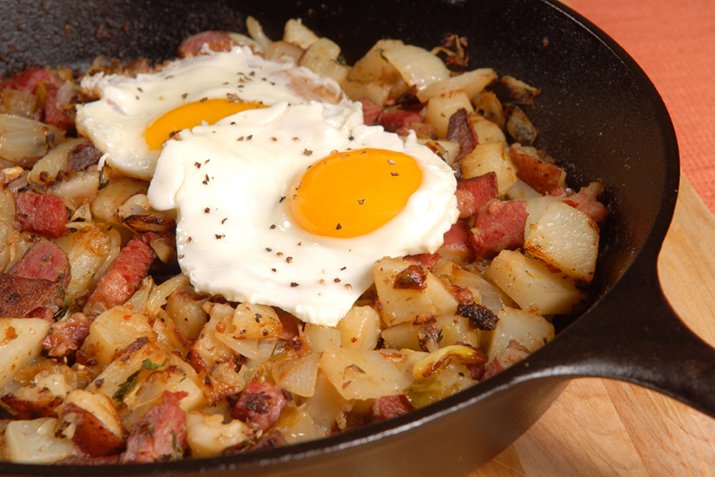
Fish with Indian Curry Butter

A very simple fish dish made spectacular with Indian curry butter.

Ingredients

  • 4-6 portioned fish fillets (tilapia, striped bass, or halibut)

  • 3-4 tablespoons butter

  • 1 clove garlic, minced

  • 1/2-inch piece of ginger, peeled and minced

  • 1 teaspoon curry powder

  • Pinch of cayenne pepper

  • 1/2 teaspoon salt

Preparation

  1. Preheat the oven to 425°F.

  2. Melt the butter in a small pan. Add the garlic, ginger, curry, cayenne, and salt, and gently cook over low heat for 4-5 minutes.

  3. Place the fish on a sheet pan and brush with the curry butter. Bake the fish for 8-10 minutes, or until it reaches an internal temperature of 145°F.

  4. When serving, drizzle the fish with the butter left in the pan.

Nutritional Information

Per Serving: 238 calories, 11 g. fat, 69 mg. cholesterol, 1 g. carbohydrate, trace dietary fiber, 32 g. protein, 338 mg. sodium.

Reprinted with permission from grocery.coop

Millet Yam Cakes

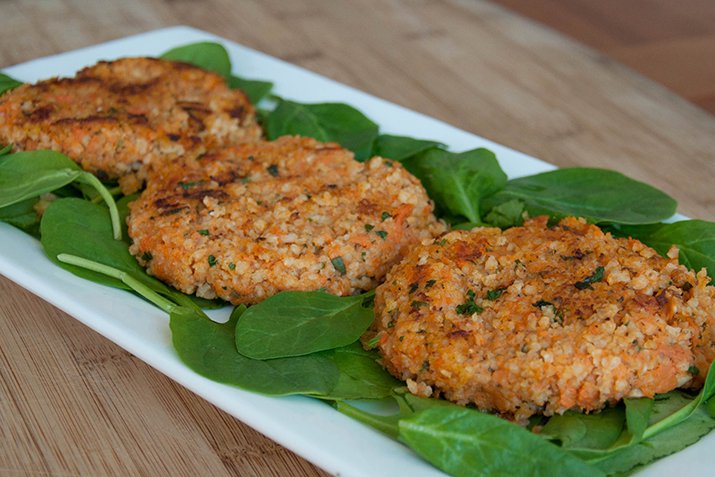
Millet is an often under-appreciated grain, and its sweet nutty flavor is perfect in these satisfying cakes. The little yellow grains and deep orange sweet potatoes make a moist, chewy patty with crispy edges that will appeal to kids and adults alike.

Ingredients

  • 1 pound sweet potatoes

  • 1 cup millet

  • 2 cups water

  • 1/4 cup parsley, minced

  • 2 cloves garlic, minced

  • 2 tablespoons fresh sage, or 2 t dried

  • 1 teaspoon salt

  • 1/2 teaspoon pepper

  • 1 large egg

  • oil, for frying

  • Aioli, ketchup or hot sauce

Preparation

  1. Preheat the oven to 400° F, and place the sweet potatoes on a sheet pan. Roast until completely soft, about 30 minutes. Let cool, then strip off the skins and mash thoroughly in a large bowl.

  2. Toast millet in a skillet over medium-high heat or in the oven until golden. Boil water and add toasted millet, return to a boil, lower heat and simmer covered 20-30 minutes, until all the water is absorbed. When millet is done, add to the sweet potato, parsley, garlic, sage, salt, pepper and egg. Stir and mash with your hands until the mixture holds together.

  3. Use an oiled half cup measure or 8 ounce ice cream scoop to form 1/2 cup portions of the millet mixture. Flatten them gently into 3/4 inch thick patties, place on an oiled plate, and chill until time to cook.

  4. Coat a large frying pan with oil, then heat until very hot. Carefully place the cakes in the hot pan. Reduce the heat to medium. Fry for 3 minutes on the first side to brown before turning. Flip the cakes carefully and brown on the second side. Turn every two minutes, until the cakes are golden brown and cooked through. They will be firm to the touch.

  5. Serve hot with sauces of your choice.

Serving Suggestion

Serve it with a tasty sauce and a salad and you have a splendid veggie meal.

Reprinted with permission from grocery.coop

Making Preserved Lemons at Home

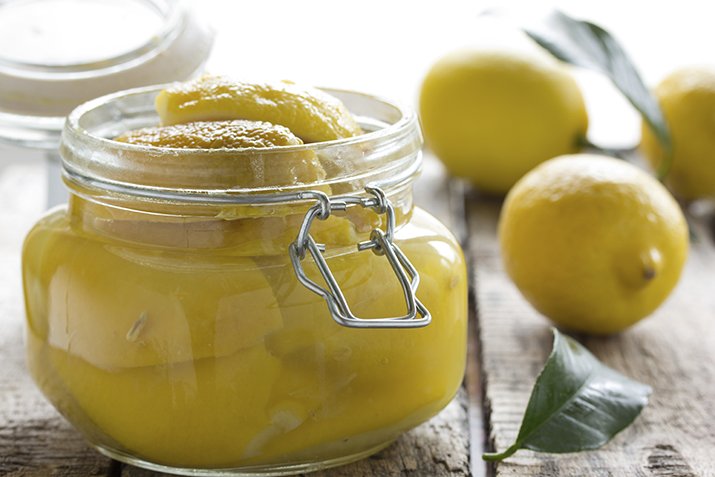
If you think a fresh lemon delivers a great flavor, you need to try a preserved lemon. Especially common in Middle Eastern, North African, and South Asian cooking, they add a savory tang to everything from stews to braises, dressings, and sauces. The peels soften, and the fermentation adds great depth of flavor and umami. A salty, tangy flavor explosion, a jar of preserved lemons in your fridge can be your secret weapon for perking up simple recipes. Try it minced into a salad, added to casseroles, even pureed into hummus.

Ingredients

  • 10 lemons, scrubbed very clean (you may not be able to fit all of them in your jar)

  • 2 extra lemons, for juice

  • 1/2 cup kosher salt, more if needed

  • Extra fresh-squeezed lemon juice, if needed, from the lemons that won't fit in the jar

  • Sterilized quart canning jar (how to sterilize jars)

  • 2 tablespoons whole cumin or fennel seeds, optional

Preparation

  1. Sprinkle 2 tablespoons of salt into the jar. Prepare each lemon by slicing off just a little of the stem end and tip, then quartering each lemon lengthwise, leaving them attached at one end. As you slice each lemon, pry the quarters open and sprinkle salt inside and outside of each one, then pack into the jar. Pack them in with some force, to squeeze out some juice to fill the gaps with liquid. Once all the lemons are salted and packed in the jar, sprinkle a couple tablespoons of salt over them, then squeeze the remaining lemons, if necessary, to fill the jar with lemon juice. Screw the lid on the jar and let the jar sit out at room temperature for up to 30 days, turning it upside down occasionally to mix. Refrigerate once the skins soften.

  2. To use, take a lemon out of the jar and rinse well to remove the salty brine. If desired, use pulp, or discard. Chop remaining lemon rind for use in recipes.

Tips & Notes

Save the salty lemon brine—it's delicious in small amounts in dressings, marinades or other dishes that might use lemon and salt. Hummus, tabbouleh, even pastas with greens or chicken are uplifted by a little preserved lemon and brine.

Recipe Ideas

Reprinted with permission by grocery.coop

Teriyaki and Pineapple Beef Skewers

A pineapple juice marinade tenderizes the steak and adds a dash of sweetness to these easy and delicious beef and pineapple skewers.

Ingredients

  • 1/2 cup soy sauce

  • 1/2 cup pineapple juice

  • 2 tablespoons vegetable oil

  • 1 tablespoon sesame oil

  • 2 cloves garlic, pressed

  • 1 inch fresh ginger

  • 2 lbs. boneless round steak, cut in long, 1/4-inch thick slices

  • 1 small pineapple, peeled and cubed

  • Skewers for grilling

  1. In a large bowl or tub, combine the soy sauce, pineapple juice, vegetable and sesame oil, garlic, and ginger; whisk to mix. Add the beef slices and pineapple cubes and toss to coat.

  2. Cover the beef and pineapple tightly and refrigerate for at least 4 and up to 24 hours. To grill, remove the beef and pineapple from the marinade and shake off excess marinade. Start skewering by piercing one end of a beef strip, then skewer a pineapple cube and wrap the beef around it, skewering the beef above the pineapple. Depending on the length of your skewers, two or three strips of beef and pieces of pineapple may fit on each.

  3. Place the skewers on a tray or sheet pan.

  4. Preheat the grill to medium heat. Just before grilling, pour a little oil in a cup, then use tongs to dunk a wadded paper towel in the oil and swab the grill grate. Place the skewers on the grill and cook for about 3 minutes per side or until beef is cooked to your liking. Serve hot.

Serving Suggestion

Serve these skewers with a side of rice, a green leaf salad or grilled veggies, like onions, yellow squash and zucchini.

Reprinted with permission by grocery.coop