Spring

Rhubarb Snacking Cake

It's rhubarb season! Whole wheat flour, rolled oats and tangy rhubarb combine for a scrumptious, snack-worthy cake.

Ingredients

  • 1 cup rolled oats
  • 1 1/4 cup brown sugar, divided
  • 6 tablespoons butter, divided
  • 1 cup whole wheat pastry flour
  • 1/2 cup unbleached flour
  • 1 teaspoon baking soda
  • 1/2 teaspoon salt
  • 3/4 cup nonfat plain yogurt
  • 1 large egg
  • 1 cup thinly sliced rhubarb

Preparation

  1. Heat the oven to 350°F. Lightly oil or butter a 9-inch square baking pan. Melt the butter. In a medium bowl, combine 2 tablespoons of the melted butter with the oats and brown sugar. Mix well and set aside.
  2. In a large bowl, mix the flours, brown sugar, soda and salt. In a separate bowl, whisk together the yogurt and egg; slowly add the remaining 4 tablespoons melted butter, while whisking the mixture. Pour the yogurt mixture over the dry ingredients and stir just to combine. Quickly stir in the rhubarb. Scrape the batter into the prepared pan. Sprinkle with the topping, then bake for 30 to 35 minutes. A toothpick inserted in the center of the cake should come out with no wet batter sticking to it. Cool the cake on a rack. Serve warm, or wrap tightly and refrigerate for up to a week.

Serving Suggestion

When rhubarb is in season, make the most of its tangy, pink stalks in this quick cake. You can even make this with frozen rhubarb in the middle of winter, if you like; just bake it 5 or 10 minutes longer. Top with a dollop of whipped cream or coconut sorbet for special occasions, or just slice and enjoy!


Reprinted by permission from StrongerTogether.coop. Find articles about your food and where it comes from, recipes and a whole lot more at www.strongertogether.coop

Cauliflower “Couscous” with Asparagus and Peas

In this brightly flavored side dish, cauliflower stands in as a wheat-free alternative to couscous. With cauliflower as the backdrop, all of the fresh spring flavors shine through. 

Ingredients

  • 1 head cauliflower
  • 12 ounces asparagus
  • 10 ounces frozen peas, thawed
  • 1/3 cup pine nuts
  • Zest and juice of one lemon
  • 2 tablespoons olive oil
  • 1 small shallot, minced
  • 2 tablespoons mint leaves, julienned
  • 1 teaspoon thyme leaves, chopped
  • Salt and freshly ground black pepper to taste

Preparation

  1. Break the cauliflower florets apart, cutting the larger ones down until all the pieces are roughly the same size. Place the florets in a food processor and use 8-12 quick pulses to reduce the cauliflower size and texture to slightly smaller than a grain of rice.
  2. In a 12-inch skillet, heat 1/2 cup water and a pinch of salt to a simmer. Add the cauliflower in a single layer. Bring back to a simmer, reduce heat a little, cover and cook cauliflower 5 minutes, or just enough to take the raw edge off, but not so much it becomes soft or loses texture. Remove the cauliflower from the skillet and drain in a colander or mesh strainer, then place in a medium serving bowl.
  3. Heat a small, dry skillet over medium heat. Add the pine nuts and stir frequently. Toast just until they smell nutty and have begun to turn golden, about 3 minutes. Remove from heat and set aside.
  4. Remove the woody ends of the asparagus, then cut each spear on the bias into 1-inch lengths. Wipe out the skillet used for the cauliflower, add the olive oil and heat over medium heat. Add the shallot and sauté gently for a couple minutes, until translucent. Add the asparagus and continue sautéing a few minutes more, just until the asparagus is al dente. Add the lemon zest and juice, fresh thyme and salt and pepper and cook another 30 seconds or so.
  5. Add the shallot-asparagus mixture, peas, pine nuts and mint to the cauliflower. Drizzle with a little olive oil and toss gently to combine. Adjust the salt and pepper, and lemon juice to taste. Serve slightly warm or at room temperature.

Artichoke Pasta

This quick and simple pasta salad is packed with delicious flavor.

Ingredients

  • 1/2 pound pasta shells
  • 1/2 red bell pepper, diced
  • 1/2 green bell pepper, diced
  • 1 tablespoon fresh garlic, minced
  • 1 (14-ounce) can artichoke hearts, quartered, drained, and rough-chopped into large pieces
  • 1/2 cup mixed chopped olives or chopped, pitted kalamata olives
  • 2 teaspoons capers
  • 1 teaspoons juice from capers
  • 1/2 cup shredded Parmigiano Reggiano cheese
  • 4 tablespoons fresh basil, minced
  • 4 tablespoons olive oil
  • 2 tablespoons lemon juice
  • 1/2 teaspoon sea salt
  • 1/2 teaspoon ground black pepper

Preparation

  1. Cook pasta until al dente and drain.
  2. Heat 2 tablespoons of the olive oil in a skillet and sauté the bell peppers and garlic for 2-4 minutes.
  3. Add artichokes, olives, capers, and caper juice and sauté a couple minutes more.
  4. Toss the pasta with the sautéed vegetables and 2 tablespoons of olive oil, lemon juice, basil, salt, pepper, and Parmigiano Reggiano. Serve cold or at room temperature.

Serving Suggestion

Delicious served with green salad and garlic bread. For a non-vegetarian pasta dish, serve with Italian sausage or meatballs.


Authored by Seward Food Co-op Deli. Reprinted by permission from StrongerTogether.coop. Find articles about your food and where it comes from, recipes and a whole lot more at www.strongertogether.coop

DIY: Natural Egg Dye

Easter Eggs

Egg dyeing is a fun way to celebrate this time of year—and it's a tradition that goes way back—as much as 5,000 years when Persians celebrated springtime with eggs colored with plant-based dyes. Plant dyes can be just as useful today and they're plentiful; in fact you very well might have dye-worthy ingredients in your kitchen already.

Here are some great plant-based dyes—fruits, vegetables, spices and flowers.

Items Needed

  • White eggs (or try brown, keeping in mind color results will vary)
  • Egg carton
  • Stock pan(s)
  • Water
  • White vinegar
  • Slotted spoon
  • Natural materials for dyeing (see table).
Natural Egg Dye

Optional: Tape, string, rubber bands, cheese cloth squares, natural beeswax crayons to create designs on eggs, and vegetable oil for an extra sheen. 

Directions

Beet dye including pulp (top), onion skin dye with celery, bay and ivy leaves wrapped in cheese cloth (middle two), turmeric dye with rice wrapped in cheese cloth (bottom).

Hot Bath Method

  1. Place uncooked eggs in a stainless steel stock pan. Add water 2-3 inches above eggs. (When using bottled juice, fill 2-3 inches above eggs. Do not add water.) Add natural dye ingredients and 1-2 tablespoons vinegar per quart of water.

  2. Cover and bring to boil, reduce heat and simmer for 15-20 minutes.
  3. Carefully remove eggs with a slotted spoon and air dry.

Cold Bath Method

The process for cold dyeing is much the same as the hot method except the eggs and dyes are cooked separately.

  1. Simmer the dye ingredients (water, vinegar and dye matter) for 20-30 minutes or longer, until the dye reaches your desired shade.
  2. Allow the liquid to cool and submerge hard-boiled eggs in the dye for at least 30 minutes.
  3. Carefully remove eggs with a slotted spoon and air dry.  

Notes, Tips & Techniques

Color variation

Colors may vary depending on steeping time and foods used to dye eggs.

Deeper colors

The longer the eggs stay in the dye, the deeper the color will be; leaving the eggs in the dye for several hours or overnight (in the refrigerator) is recommended for achieving deep colors. Allow the liquid and eggs to cool before refrigerating and ensure that the eggs are completely submerged in the dye. Eggs will be speckled if the dye matter remains in the liquid. For more uniform colors, remove the dye matter from the liquid, by straining the liquid through a coffee filter, before refrigerating.

Egg flavor

The flavor of the egg may change based on the dye, so if you plan to eat your dyed eggs, a shorter dye bath and fresh ingredients may be preferable.

Drying

Make a drying rack by cutting the bottom off an egg carton and turning it upside down.

Decorating

  • Wrap onion skins around eggs, then wrap the entire egg with a cheese cloth square and secure it with string before placing the eggs in the dye.
  • Wrap string or rubber bands around eggs before dyeing to create stripes (use rubber bands for cold dyeing only).
  • Draw designs on hot, warm or cold hard-boiled eggs with crayons. When using hot or warm eggs, the crayon may melt slightly on contact with the egg (if eggs are hot, hold eggs with a potholder or rag to prevent finger burns). Crayon covered eggs should only be dyed in cold dyes as the crayon wax will melt in hot liquids.
  • Gently wipe dry dyed eggs with vegetable oil to give eggs an added sheen.


Reprinted by permission from StrongerTogether.coop. Find articles about your food and where it comes from, recipes and a whole lot more at www.strongertogether.coop

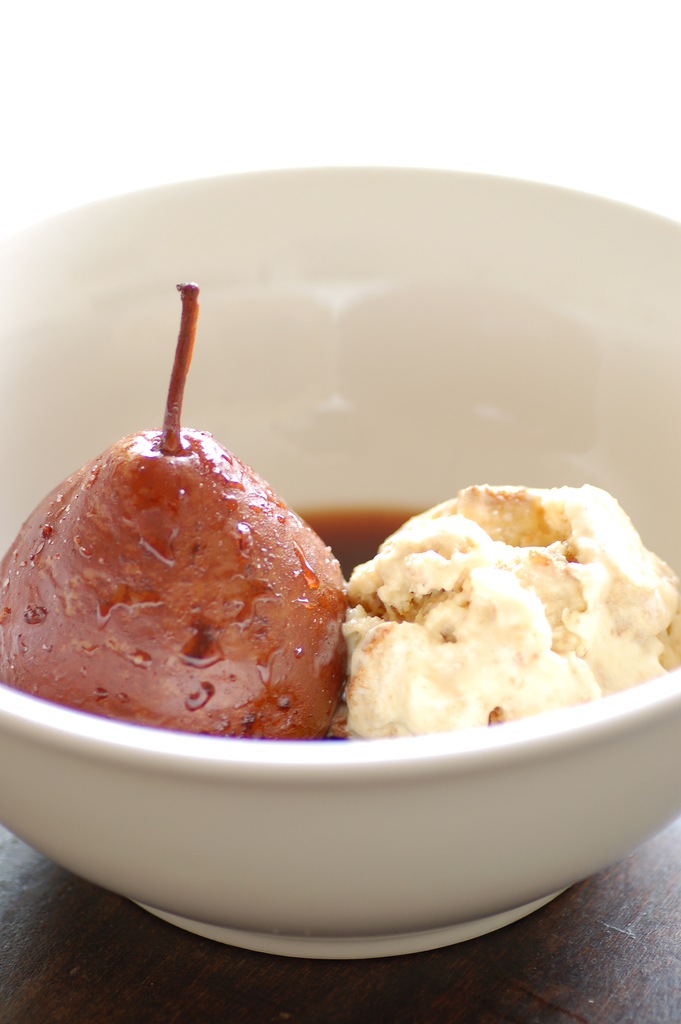
Poached Pears

For such a delicious and elegant dessert, poached pears are amazingly simple to prepare.

Via Creative Commons

Via Creative Commons

Ingredients

  • 6 firm pears (not quite ripe),
  • peeled with stems on
  • 3 cups red wine
  • 1 cup water
  • 1 cup sugar
  • 1/2 vanilla bean, split in half lengthwise
  • 1 star anise
  • 2 tablespoons honey
  • 1 tablespoon lemon juice

Preparation

  1. Choose a cooking pot that will hold the pears snugly. Place red wine, water, and sugar in the pot. Cut the vanilla bean in half lengthwise and scrape the seeds into the pot; add the pods along with star anise, honey, and lemon juice.

  2. Bring the liquid to a simmer and cook for about 5 minutes, stirring to make sure the sugar is dissolved.

  3. Add the peeled pears, cover, and simmer for about 20 minutes until pears are tender.

  4. Remove the pears and continue simmering the liquid until it becomes thick and syrupy. Use this syrup to glaze the pears before serving.

Serving Suggestion

Serve pears warm or cold, with a dollop of whipped cream or crème fraiche, if desired.


Reprinted by permission from StrongerTogether.coop. Find articles about your food and where it comes from, recipes and a whole lot more at www.strongertogether.coop

Planning a Summer Picnic

There’s no better way to celebrate the beginning of summer than by planning a leisurely outdoor picnic. Here’s how to keep your picnic out of bug-bite and spoiled-food territory to enjoy warm breezes, delicious food and fun.  

Prep everything ahead of time

This may seem like a no-brainer, but putting in the time to chop your veggies, assemble your kebabs, or slice your baguette before leaving the house will keep the fuss—and mess—to a minimum once you get outside.

Planning_a_Summer_Picnic_0.jpg

Stay bug-free

Bring small citronella candles to place along your picnic table. If you’re picnicking on a blanket (where fire isn’t the friendliest option), pack a bottle of chemical-free mosquito repellent from the body care section of your co-op.

Avoid foods that spoil easily

That means mayo, cream-based dips, and fresh cheeses are best left at home—unless you’re planning to transport them a short distance on ice and eat them immediately. Any leftovers should be thrown away (so plan your portions carefully!).

Practice food safety

Take care to make sure all raw meats are wrapped separately, and transport them on ice. Use separate cutting boards and utensils for handling raw meat (bring an extra plastic bag to keep them in), and wash your hands as often as possible. Hand sanitizer is a must.

Cook meat with care

photo-1455734729978-db1ae4f687fc.jpg

If you’re grilling outdoors, keep raw meats below cooked meats on the grill at all times, and make sure they’re cooked thoroughly before eating (a meat thermometer can confirm doneness). Hamburgers should be cooked to 160 degrees, poultry to 170 degrees, and beef, veal, and lamb cuts to 145 degrees.

Keep it earth-friendly

Bring reusable napkins (you’ll not only avoid fly-away paper napkins, but cloth napkins can also be used to wrap food and bottles for transport). If you are using disposable products, look for recycled and biodegradable options at the co-op. And make sure your picnic spot’s as pretty as a picture for its next al fresco diners!